Lately I’ve been having this huge urge to decorate the house. This is big news. I do not decorate.
Arguably, one of the reasons why is because I. absolutely. hate. to. buy. mass. produced. decor. (Also, I can’t ever remember if pink and purple go together or not.)
Anyway, this extends to photo frames. You might think, with my trigger finger on the camera all the time, my house would be littered with photos.
Nope. Just my hard drive.
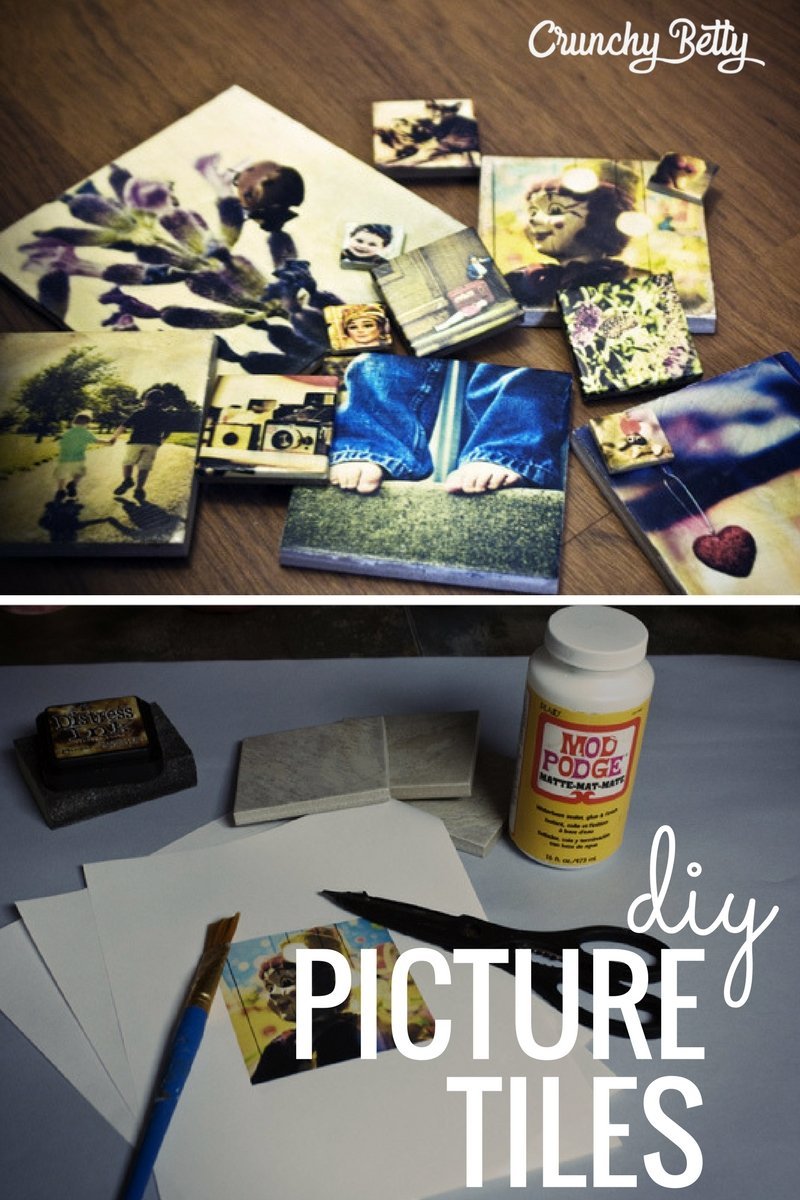
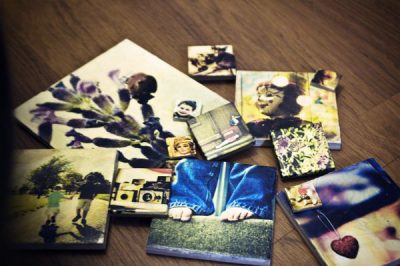
Long story short, I discovered this method of transferring my photos cheaply, quickly, and beautifully to something uncommon and unique.
Tiles. Tiles from the hardware store. Tiles that cost $0.13 each (for the 3.8 x 3.8 ones).
The only thing that’s not particularly crunchy about this is that it uses Modge Podge or similar (and I’m not sure what’s in Modge Podge). I wanted with all my heart and soul and feta cheese to be able to report to you that homemade Modge Podge works as well as the original. It does not. (Although I think it’s an EXCELLENT glue for your kids.)
It’s just grainy and doesn’t dry clearly.
Boo.
BUT, if you can overlook that one minor issue, I think you’ll love this. Nay. You will obsess over this. You will turn your house into a tiled shrine of pictures.
And it will be glorious. Oh yes. It will be glorious.
Here’s how you do it.
How to Make Picture Tiles to Impress Your Friends and Strangers
First, you need to go to Home Depot, Lowes, or something like it. Go to the tile section. Buy single tiles – or a whole box, if you want that many.
(FYI, I found that Lowes prices on tiles were cheaper than Home Depot. Not sure if it was a fluke, but the cheapest tile I could find at Home Depot was $0.30-ish, and the cheapest at Lowes was $0.10.)
I like the stone tiles, because they have texture. Texture is good.
So you pick out your tiles in the sizes you want. (You can even get small ones to make magnets with … as you’ll see!)
And then you get home and gather what you need.
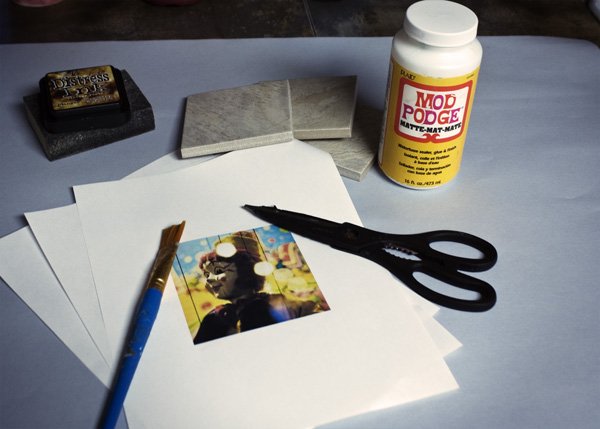
- Tiles
- Scissors
- Modge Podge
- Printed photos resized to the size of your tile
- Sanding block or sandpaper (optional)
- Paintbrush
Now, you’ll want to choose photos that work well if you crop them into a square. So on your computer, pull up your photo editor (whatever you have is just fine – Picasa, Photoshop, whatev). Crop it into a square, and then resize it to the size of your tile.
That’s right, you need to measure your tile.
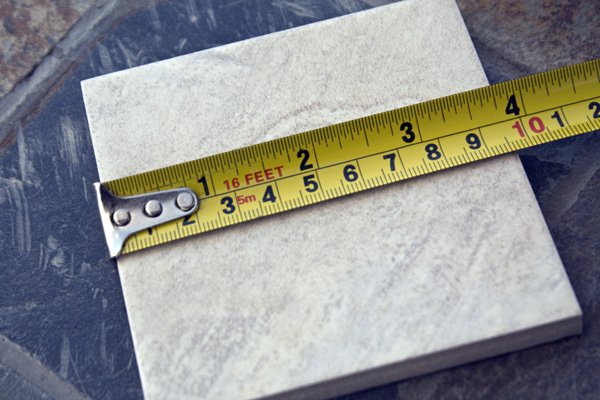
So in your photo editor, when you go to resize it, you choose the “size” by inches. For mine, you can see it’s just under 4 inches. I resized my photos for these tiles to exactly 4 inches (square). I always go a little over on purpose, because I’m like a monkey when it comes to cutting straight.
If make the image just a little too large, I can sand it down so it’s even with the square.
Also, feel free to use just regular old printer paper. The not-laser-sharp, somewhat rustic look of regular printer paper for this makes these things SO charming. So print them on printer paper (or photo paper, if you want to get all fancy).
Now you have printed pictures the size of your tiles.
Cut them out.
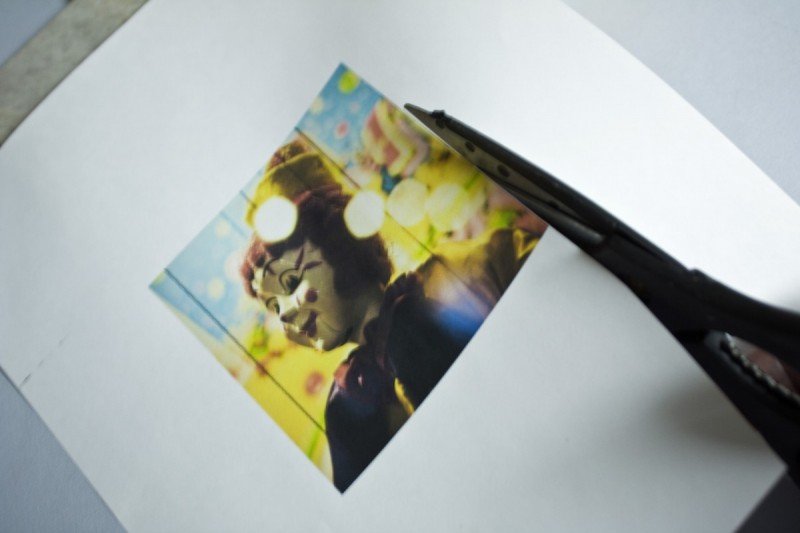
Don’t worry about cutting straight or messing up. All will come out in the wash.
Now flip it on over and give it a healthy coating of Modge Podge all over the backside.
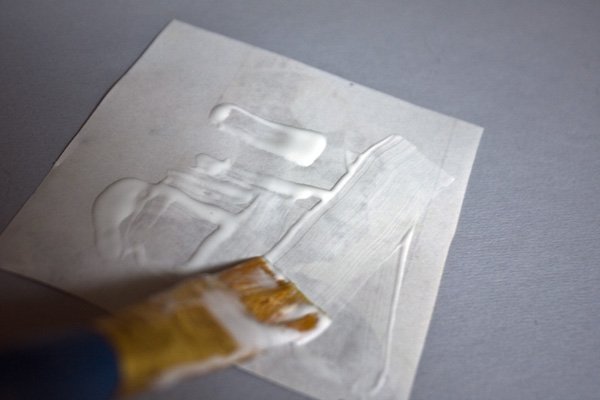
Coat it evenly throughout the back of the paper – but don’t take too long or the Modge Podge will start to dry.
Once your backside is coated (hahaha), flip it over and place it onto your tile.
Gently rub the paper over the tile until it’s positioned just right.
Then take a straight, heavy object (like another tile or a book) and press down and pull the heavy object across the tile/picture. You are getting rid of air bubbles now.
Always pull in one way, or you’ll just reposition the air bubbles all over the picture (I learned that after the 20th one).
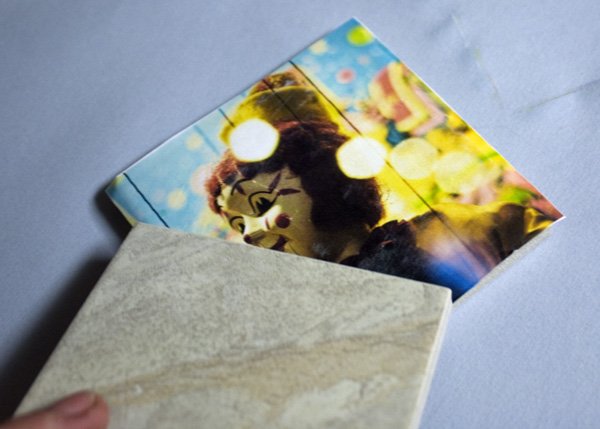
Now you want to get rid of the excess paper around the edges (unless you want to fold them down, Modge Podge them, and have your picture extend down the edges, which is fine by me).
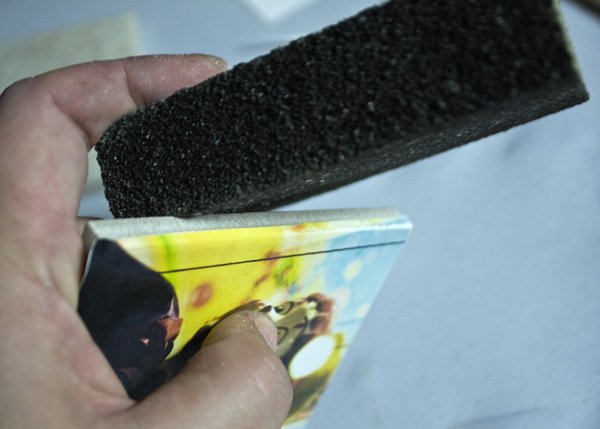
I like to use sandpaper or a little sanding block, but you could also flip over the picture tile and use a straight-edge razor blade to just shear off the extra paper.
Just take your sandy device, if you’re using one, and run it firmly, in quick motions, across the edge of the picture.
For some reason, I really wanted you guys to see this step.
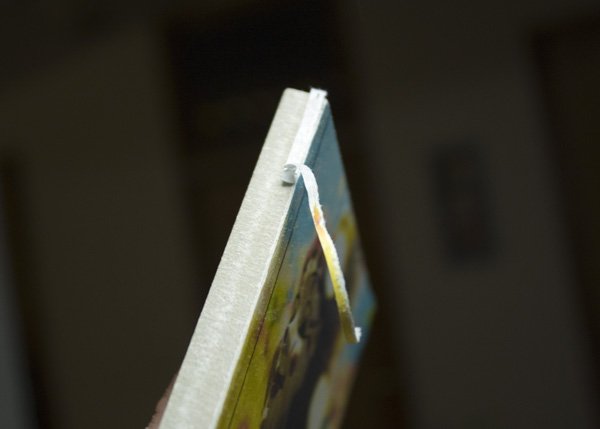
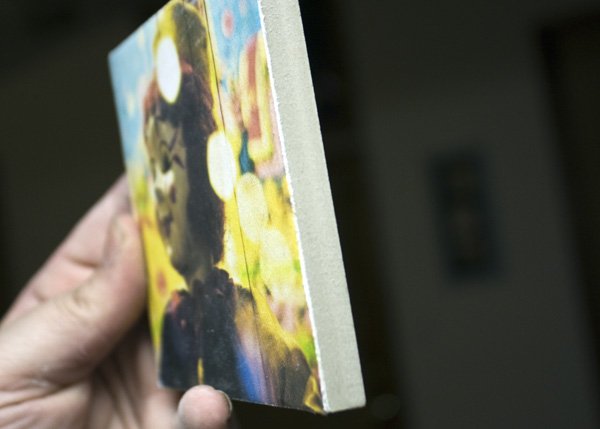
You’re almost done!
Go go go!
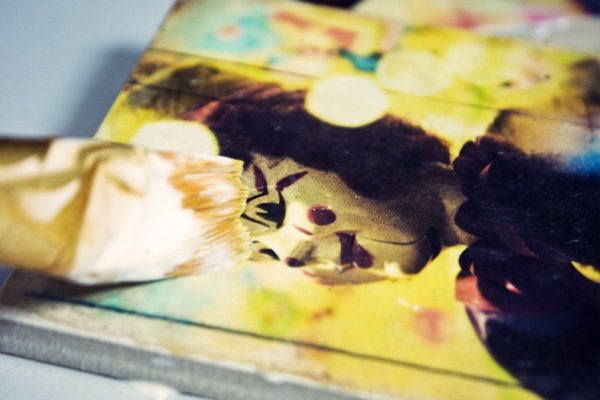
Now you just brush Modge Podge all over the front and across the sides to seal everything down and in.
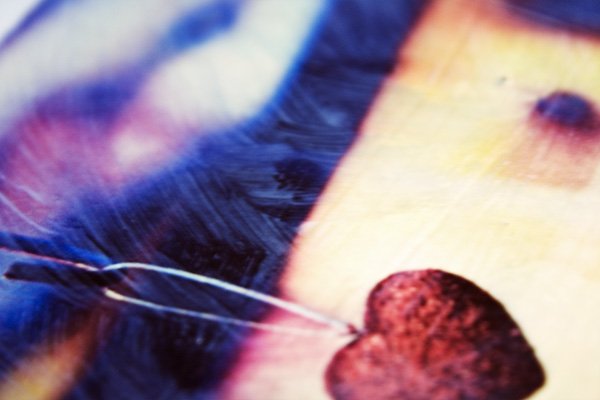
This is the artistic part. Because your ink is probably going to run just a teeny tiny bit, it will give the appearance of a painting. So use creativity when you’re brushing on the Modge Podge.
I like to give little half-swirl strokes, which just enhances the painting-like feel of the finished product.
Now let it dry for an hour or two. If you can wait.
I could not. Within 20 minutes of finishing my first and second batches of picture tiles, they were on my walls.
And my refrigerator.
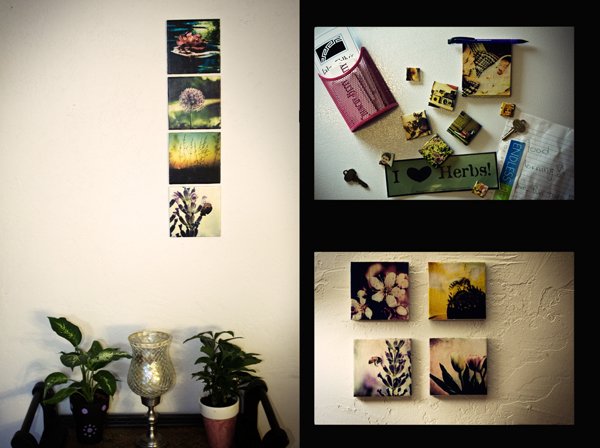
And that’s it. That is all there is to it.
I promise you – PROMISE YOU – that if I can do this and have them turn out so incredibly well, so can you. PROMISE.
How Do You Hang Picture Tiles?
Good question.
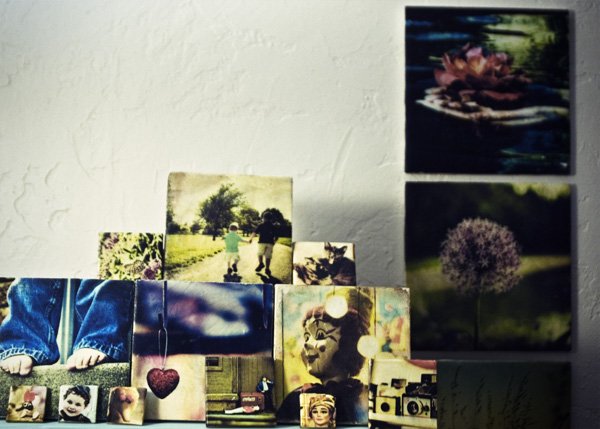
I’m as good at hanging things (as you can see by my awesomely spaced picture tiles) as I am at cutting a straight line. I wasn’t really sure how to get them on, so I looked at the end of one of the aisles at Lowes and found double-sided heavy-duty sticky tape squares.
And that’s how I did it. Two sticky tape squares per small tile, and three per big tile. And, of course, the stuff on the fridge just has magnets superglued to the back.
You could also hang them like you might hang a plate, or I suppose you could superglue a picture hanger onto the back and use the trusty nail method.
The good news is, I pulled off one of the tiles from the wall so I could take pictures with it, and it didn’t pull off the paint. Nor have, in the last week, any of the tiles felt loose or fallen off the wall. So my double-sided, heavy-duty sticky tape squares do their job well.
If You Want Pictures …
So I was thinking that maybe you guys might want to be lazy and just use some of my photos. Not because I’m an awesome photographer, but because I’m willing to crop them, resize them, and then leave them here on the blog for you to grab.
If you want.
The fun thing about doing this is using your own pictures, but I totally get it if you’d like to try it with one of mine.
If you want one/some, let me know here in the comments. If enough people are interested, I’ll upload 20 or so tomorrow that are resized for 4×4, 6×6, and 2.5×2.5 tiles (which was the size of the larger of my magnetic picture tiles).
I’ll pick my favorites (if you guys want this), but I’m also open to requests if there’s one you’ve seen on the blog over the months that you really like (or one in particular out of the groups I’ve shown here).
—
Any questions about this? The picture tile making process?
Think you’re going to do it?
Love me?
(Yes. Yes, you do.)




Mod Podge is water-based, which is why it smears inkjet printed regular paper. It should not have that affect on photo paper (which of course costs more!)
I have just learned of a product called Envirotex. You can find it on Amazon.com and perhaps at some craft / hobby shops. It supposedly leaves a glossy, clear, unsmeared finish that is much thicker than Mod Podge or lacquer. I haven’t tried it yet, but will soon.
By the way, many of my projects are tiles which I have colored with markers and “marble-ized” or created other effects on with rubbing alcohol. I also sometimes write short poems and hand write them on the tile, or print them in an appropriate font and glue them to the tile before finishing it. To glue the paper (photo or other) to the tile, I just use a glue stick or Elmer’s etc.
Thank you for the information that you make on this blog, it’s very helpful to me in finding reference to add to my knowledge and research in the course of mine. thank you if you have a trouble wit your printer this your choice solution,Download Printer Reviews– Epson L850 Driver Download ink tank based printers have been looked for after since
Thank you for the information that you make on this blog, it’s very helpful to me in finding reference to add to my knowledge and research in the course of mine. thank you
Love the tips and tricks for the best results using photos and tiles, very nicely done! I had a question, from the image of items needed for the project in the upper left portion of your photo I see the Tim Holtz distressed ink pad. How are you using that in your projects? That was not listed.
thanks!
I’m in no form or fashion creative. I love this idea.
I wanted to see if you would kno the best way to waterproof it, if possible. I’m putting it at my baby brothers grave site. He was just laid to rest yesterday and i didnt have nothing going for me as time goes, so i wanted to put it grave side.
Thank you for your time.
Donna Russell Trekell
Email: [email protected]
Wow. It’s so cool. I should try at home asap. Thanks for the tips for making this frame.
Right now it sounds like WordPress is the preferred blogging platform available right now.
(from what I’ve read) Is that what you’re using on your blog?
Love your work want to do these on my late husband’s grave with our grandkids photos. He would be very proud to have seen his grandkidos which he did not know. I love to do crafts but yours is very artist GreatJob.
I love this, and have seen others similar, one was using acetone (nail polish remover). But that stuff smells so bad. How is the Mod Podge as far as odor? I can work out on my patio if I need to but I prefer my office to I can listen to Pandora music on the computer.
Thanks for the helpful tutorial. If readers are worried about damage to walls, they might try the 3M Command Brand strips for hanging the tiles. Resizing to square prints is easier now than when you wrote the post, as so many iPhone apps (including the native camera app) now have square photo options, thanks to the popularity of Instagram. Inkjet printers vary in how waterproof the prints are. The Epson Durabright inks, for example, won’t run even under a faucet, tho HP inks are so water-soluble that you can turn prints into something that looks more like a water color painting with a wet brush. Being aware of this can help you getting artistic effects as you apply the Mod Podge. And if you can find the glass tiles at Home Depot they are more expensive but have a really nice look if you’ve printed on tissue/mulberry paper or vellum so your picture is somewhat transparent.
Hope these comments are helpful.
What do you use to hang your tiles?
I got the inspiration for tiling my backsplash with my own photos, and YOU proved it can be done. Take that, Shutterfly. You missed a golden opp!
This is fantastic, thank you. My mind is constantly puking out fantastic ideas but I lack the ability to focus and complete projects in a simplistic manner. This is so helpful.
urban fashion tumblr blogsRookstool
Hello! Thank you dor sharing rhis. I tried it and it is soo fun! Quick results too…however, i seem to have difficulty dealing with the sides? : ( Thank you….
I was thinking of a way to save the kids’ artwork and display cool family pics without needing to hoard heaps of artwork or buy heaps of frames – so I googled ‘how to make ceramic tile artwork’ or similar and found myself here. Thank you!! I currently live in rural Japan and didn’t have the immediate access too ceramic tiles or Mod Podge, and in fact had to google that too. While I could have ordered online I needed to do it today, as you do. I didn’t fine ceramic tiles at the local rice paddy supply shop, but I did find wooden ones -and some clear setting glue that ‘I think’ might resemble what you used. I tried it out, with a glass of wine. I love it and see myself getting no housework or work work done tomorrow!
Live this article. Any idea what I would need to do differently if I wanted to put a photo tile outside in my garden? We just lost our 10yesr ild golden retriever and I would like to add a photo tile of her to our garden
My daughter and I have been doing this to tiles for many months now but have never tried the stone tiles, great idea for something different. Also, we paint the sides of out tiles and part of the bottom, cork backing covers most of the bottom anyway. But have a question, she is making 6×6 trivets but after 4 different heat resistant sealers it’s still not 100% heat proof, any sugestiins or something you have used or heard of working?
Nice..
Thank you so much a great idea,I am painting on tiles and wanted a way that I could hang them,I found it.
wawww,,,,its funtastic information,,
Great.
Nice information,
especially for those who like to edit photos …
I am learning about how to be a photographer,
but I understand less about how to make my photos in order to impress other people saw it,
by reading this article, it has been inspiring to me. ..
thanks …
I really liked your article is nice and creative, because it is very useful for me. Thank you for sharing….
very nice, I like your post because it has a value of creative art. Thanks,,,,,
Love This! Thank you for the tips!
NOT FOR PUBLICATION.
Hi Betty…
Please let me know how I can contact you by email about reprinting an article on your web site.
Thanks.
Arthur
actually, I really liked your article with because it is very creative and very interesting, because I was so amazed with the results of your work and your blog is very useful for everyone
Hello. Would this method look good and be possible for a kitchen tile backsplash? I would like to copy some artwork I brought back from Europe to place occasionally onto some of the tile. How would I go about doing this to make it last? Could it be done on tile already on the backsplash wall and could it be removed later?
I was looking at companies that transfer, but would be expensive.
Would I just take a photo then have it printed out (what kind of paper or printing? Use professional copier like office max?)
Thank you for your time and response.
Hey, so Modge Podge isn’t water proof so when using as a coaster or something in your kitchen like the back splash I recommend purchasing a Modge Podge Clear Acrylic Sealer, it comes in Matte or Glossy just like the Modge Podge. It’ll seal it and keep it from ruining the pictures!
woo-hoo Thanks for the ideas on how to hang my tiles on the walls. The sticky tiles will be heavy enough to hold even the most heavy tiles. I am thinking of trying a collage from a vacation. Fun presents.
This project is good i like it,, thanks for your blog its fery importan for me. These would look so fun displayed throughout your living room, on end tables and the coffee table
I really like your writing and this is very helpful
I have no experience with this, but I think I will take this as an alternative. For me, this is very helpful
Ha yes we love you. Ive been transferring bw by gel nedium to dry walls in my bathroom…cool possibilities there, and super cheap.
Is there a specific type of mod podge that works best for this? I did a quick search on amazon & there were so many different types!
Love this idea. Definitely going to do. I’m also going to **try** to modify it a bit and apply a pic to a relatively flat rock that we used as a headstone for our dog who passed away recently. Wish me luck & thanks!
Hey, I think your blog might be having browser compatibility issues.
When I look at your blog site in Safari, it looks fine but when checking in my web browser,
it has some overlapping. I just wanted to give you a quick heads up!
Other then that, very good blog!
You really make it seem really easy along with your presentation but I find this
matter to be really something that I think I would by
no means understand. It sort of feels too complex and extremely huge for me.
I am taking a look ahead in your next put up, I’ll try to get the dangle
of it!
This tutorial is amazing! It never came to me that tiles can be used in such creative ways. This is a great way to decorate the entire house without spending lots of money on picture frames and ornaments. If I knew this earlier, maybe I wouldn’t spent so much on my homes interior.
So love the idea and ready to go but having issue with thickness of paper and sandy device was block with sand paper didn’t work at all 🙁 did you use photo paper and did you find the thickness an issue ? and can you tell me what “sandy device” you used name brand please
thank you so much
H
Thanks for sharing, I really enjoy this
I made these today and when the mod podge dried, it left lines on the pictures. Is this normal? If not, what do I use to not get the lines?
very informative post as well as best thought
I’m going to try the pictures on the tile. Unfortunately my husband used thick printer paper. Kind of stiff but I’m so excited. If it works I’m giving a bunch away as gifts!
t uses mod podge, so it’s not archival, but they look really nice. There is a tutorial here, including how to hang them.I am curious to find out what blog platform you’re working with?
I’m having some minor security issues with my latest website and I’d like to find something more safeguarded. Do you have any suggestions?
I almost never leave comments, however,this is such a good idea that I wish it was mine. My hard drive is full of photos also. I need to hook up my printer and get creative.
I am curious to find out what blog platform you’re working with?
I’m having some minor security issues with my latest website and I’d
like to find something more safeguarded. Do you have any
suggestions?
Would the same processes be applied if I were to use a photograph printed professional? I’d like to have a more “sharp” image as the outcome! Any thoughts??
Hi Cassie. If I were you I would print out on regular paper, and let the images ink dry for an hour or so, then use epoxy or resin to set it instead of mod podge. Make sure it’s clear resin. There is a kit at Michaels and Joannes and I am sure AC Moore has it too called “Easy Cast”. It’s two bottles a hardener and the resin itself. Use the 40% off coupon on their website they have every week and you can get it for 8.00. Make sure you follow the directions inside the package to a tee, or else the resin just ends up sticky. It will take 24 hours to dry completely. Put one coat on the tile then stick the photograph on, then paint another coat of the mixed solution on top, blow through a straw to move the resin around so you can get rid of brush strokes and air bubbles. Then let dry and keep away from finger prints and dust and animal hair for 24 hairs. It will be hard, like a ceramic mug and it won’t look painted like this technique. But I like this technique. The reason I say to use regular paper, is because at the end you can also sand down or shave off the edges, like in this tutorial. And the photo paper may give a more raised appearance then regular paper or even not stick as well to epoxy.
Thanks for the awesome sharing.
Is this the tiles you are using? http://www.lowes.com/pd_1224-74035-SL1044HCBP_0__?productId=1126001&Ntt=4-in+x+4-in+tile&pl=1¤tURL=%3FNtt%3D4-in%2Bx%2B4-in%2Btile&facetInfo=
I can’t seem to find any others around $0.10.
Can you also share where did you get your 2.5×2.5 tiles? Can’t find such size in Lowes and Home depot. 🙂
Hi,
Can you use these as coasters? Also, do you just leave the coat of mod podge on the top of the photo? Other instructions I have found say to wipe it off. Also can you spray a sealant of fixative on top of the photo once dry to protect it from liquids? Thank you.
Kind regards,
Sheila
hi sheila, i’m planning on making mine into coasters as well, i would love to know if you made them and what products did you use? or, maybe our friend, crunch betty can give us more info…thanks!
Sheila,
I made these many years ago and used one of them as a coaster and the picture was all messed up. You will need to cover the finished piece with some type of resin or sealer if you are going to use as a coaster.
i think you are wonderful !!! the imagination and the manner in which you profess your joy at having done this awesome project, and also the energy you put into explaining the processes and tips and tricks is great !! I am an old photographer and having just lost all my family and then having all my storage garages ripped off completely , and my family’s and my life possessions stolen ,including all my cameras , photo albums,photos , negatives discs,hard drives , every photo i ever made and we are talking 45 years of it…it broke my heart and broke me too!! i am still in love with photography, just have no way to do it …sorry , way off track !! i could have built a house of my photos and would have done the walls with your idea and my photos were i able to !! Just wanted you to know you inspired me and to thank you !! with love and respect , peace , elizabeth
Had this idea and was searching for someone to make this commercially when stumbled on your site. I want to do my own photos and put them on little tiles. I am oh so excited and grateful to you for so generously sharing your creativity and ideas and lovely humour.
Thank you, loving your work and kind lovely soul.
Cant wait to do buy some tiles and get stuck (hopefully not literally) in
Cx
Can you buy Modge Podge in the uk, if so where?
Great Idea.
You’ve inspired me to go thru my pics and give it a try. Loved yours. Thanks!
HELLO MRS CRUNCH……IF YOU HAVE A MO……I HAVE A QUANTITY OF TILES THAT ID LIKE TO APPLY YOUR METHOD TO, BUT THEY ARE HIGH GLOSS…….IS THIS GOING TO WORK OR AM I DOOMED TO FAILURE?
I’m not sure why but this website is loading very slow for
me. Is anyone else having this issue or is it a issue on my end?
I’ll check back later and see if the problem still exists.
This excellent website definitely has all the info I needed about thi
subject and didn’t know who to ask.
Hello! Quick question that’s totallky offf topic.
Do you know how to mmake you site mobile friendly?
My blog looks weird when browsing from my iphone 4.
I’mtrying to find a template or plugin that might be able to resolve this issue.
If you have any recommendations, please share. Many thanks!
I LOVE this idea! I need to try with some pics that I have. Especially the ones of my son!
These picture tiles are lovely and an excellent idea!
Do you mind if I quote a couple of your posts as long as
I provide credit and sources back to your webpage? My blog is in the
very same niche as yours and my visitors would really benefit from some of the information you present
here. Please let me know if this alright with you.
Many thanks!
Appreciating the time and energy you put into your website and detailed information you present.
It’s awesome to come across a blog every once in a while
that isn’t the same out of date rehashed information.
Great read! I’ve bookmarked your site and
I’m adding your RSS feeds to my Google account.
Awesome creatives and I really likes you DIY tutorial. It will help us to decorate our home. Thanks for sharing
What a great idea! These would make perfect Christmas gifts. =)
This is awesome and I love your humor! I will be a couch potato for two weeks and this sounds like the perfect project! Thank you!!!
I love this! I think you could also get a piece of wood that could hold the tiles like scrabble pieces…. Just a thought but this will be an awesome craft for the kids:)
I like the helpful infco yyou supply in your articles. I’ll bookmark your boog annd check again here regularly.
I’m rather certain I’ll learn lots of new stuff proper here!
Good luck for the following!
Tile tip: I went to the Habitat for Humanity restore and got lots of tiles for super cheap. They’ll have all different types and have so many they practically give them away.
Great blog here! Also your site loads up very fast! What host are you using?
Can I get your affiliate link to your host?
I wish my web site loaded up as fazt as yours lol
It’s hard to find your posts in google. I found it on 17 spot, you should build quality backlinks , it will help you to rank to google top 10.
I know how to help you, just search in google – k2 seo
tricks
FYI, you can also do this on wooden plaques – same process. And to give it more texture, after it is completely dry, you can use a fine grade sandpaper to GENTLY rub over the surface of the image – I usually use circular motions. :o)
Best lawsuit settlement Loans Provider Company in USA. Get Lawsuit Funding at Super Low As 1% Rates. Click here or Call us 1-800-918-2310 for Fast Approval
Good invention, may be useful
Hiya very nice site!! Man .. Excellent .. Superb ..
I’ll bookmark your web site and take the feeds also?
I am satisfied to seek out so many useful information here within the
post, we need develop more strategies on this regard, thanks for sharing.
. . . . .
I’m not sure how you secure the hanger to the back of the tile. I suppose you could just get the peel off ones from the hardware. I was just thinking that you could hang them from a wire along a wall.
I would like to have your pictures and thank you.
Hi Love this- have been trying this with photo transfer techniques with mixed results – going to try you way- I would love some of your favourite photos to try. Please let me know if you have uploaded any
Also I use epoxy resin – and am coating a memorial tile in a uv resistant one for outside placement – this would also work for waterproofing for insertion into a splashback
OMFG – Thanks, this is TOO AWESOME – and seems easy enough 😀
I am so going to do this for my instagram snaps of my trip round the UK!!
Hi, I have been asked to make these photo tiles for use in a shower . Will they be mold and waterproof for this use ? What extra step is needed to make them impervious to steam and water ?
Can these be grouted on a table or wall or would it ruin the picture?
Thanks!
Love this Betty!! Thanks for the crunchy details!!
Hi, did you upload any of your photos onto the site? If you haven’t and you wouldn’t mind, i would like to take a look as i am hoping to make some tile prints! Thank you X
OK…my mind is racing with this idea! I am going to print the photo bigger, cut the photos into 4 squares and line them up on the tile so it looks like you’ve used one big tile instead of 4 small ones (triptych-style).
While they are drying, I’m going to cut a piece of 1/8 to 1/4 inch thick plywood to fit in a frame (thrift store purchase, of course), then glue burlap to cover the front side of the plywood. When that dries, I’ll glue the tiles to the burlap-covered plywood leaving a tiny gap between the tiles. Add the frame and hang it like you would any photo.
I know they sell rectangular tiles, too so you could make a triptych…and I’m imagining using one big photo cut and spread across 1″ tiles so you have multiple 1″ sections of the photo spread across all the tiles (leaving tiny gaps between the tiles). OOOH! I wish it weren’t late at night cause my brain is FLYING with “must-dos” using your technique! You are definitely CRUNCHY, Betty!
Not sure what i am doing wrong…when i try to get air bubbles out it just rips 🙁
I am going to make these as gifts- I am just wondering is it better to use actual photo’s? I would like to print these at home, but have a hard time making photo’s- so what type of paper should I use?
For some people in the UK the equivalent to Mod Podge is PVA glue.
Hey, My name is Laura and I blog about tips for displaying printed Instagram photos. I have been doing lots of looking around to find unique ideas for how people display their photos and I just want to let you know I love this idea! I love seeing the crafty ideas that people create to display their photos! thank you for the inspiration and thank you for sharing.
Hiya! Never found Modge Podge in the Philippines so made do with school glue, photo paper stock with ink jet fixed with a spray on fixative. After glueing image to the tile, I would also brush on clear glue on the image’s surface and around the edges, then spray on or brush on some clear lacquer.
Still a work in progress. Looking for a better way to seal the edges before applying the clear lacquer – which at times can seep in underneath the edges. If anyone has a suggestion as to how to seal this in a better way, please do let me know! Will try to upload some photos of the finished items soon.
Thanks!
mod podge is available in an art store at SM North Edsa (top floor). not sure if that’s the annex part. I think other art stores have this too.
This would be fun to try. Could I get copies of your pictures?
Hi, can you use these as trivets? Does the heat cause a problem to the tile?
If these finished tiles get dirty after hanging for a while….how do you clean them without ruining them or cleaning off the Hodge Podge?
I did this after a few coats of modge podge I then coated them with a waterproof coating and added them into my backsplash in the kitchen for some added pop turned out very nice
Does anyone know if this can be done for use outside? I am wanting to place on a gravestone so need it to be weather resistant and long lasting.
Thanks,
Tina
hi…can regular photos on photo parer be used ?
I love the idea of having printed tiles as a feature in my bathroom and as the splash back in my laundry. The process seems simple and fun to do. However, I am concerned about the durability of the finished product. How do I seal the tiles so they are not damaged during grouting and they can be washed regularly, so the image doesn’t get damaged or fade over time.
Chris
I have used poly resin, it is cheep for the amount of protection that it provides. It is really easy to use, just make sure you follow the directions on whatever brand you buy. ( they do differ ). The poly resin holds up very well outside, as well as inside in wet conditions. You must remember tho, it is a form of plastic resin, so scrubbing with a scratchy sponge will leave scratches, but cleaning with your regular household cleaners is fine. This is the same thing they use to make bar top and tables in food establishments.
We
Is there a certain photo software you used to resize the photos to 4×4? I am wanting to do therefor Christmas gifts and want to try it ahead of time. Thank you
Hi,
I’m in Australia And the shop assistants do not Know what modge podge is(excuse the spelling) so what is it? Thanx Shaz
If you go to a Spotlight Stores they sell it
Excellent post. Keep posting such kind of info on your site.
Im really impressed by it.
Hello there, You have done an excellent job. I will certainly digg it and in my opinion recommend to my friends.
I’m sure they will be benefited from this web site.
Tried this earlier in the week, easiest (and cheapest) craft ever. Love the final effect, so simple. Only got one thing left to do: hang them! I don’t fancy the double sided tape idea at all, I’m not confident that a tape that won’t strip paint will be strong enough to hold a heavy tile. Has anyone hung them any other way?
Brushing Modge Podge all over the front didn’t meant part on the picture,or did it?
Hi,
I LOVE the idea, but want to use the tiles outdoors – what could I do to make them weather-proof?
Kind regards
Brenda
would this work with bathroom tiles as well, or they would come off because of the water?
This is great!!! I wanted to try to do this and leave outside (thinking of a memorial garden sort of thing).
Any thoughts on how to seal these for outdoor (realizing this may be super obvious and simple so thanks for your patience with my question)! 🙂
PS I love the humor on this site, it is most awesome.
Grazie
EC
Mod Podge makes exterior Mod Podge now. It should be right next to the original Mod Podge. I think it would be fun to do a crackle finish on these tiles and would give an interesting look. If I’m not mistaken, Mod Podge makes a crackle finish as well…but if not, ask for crackle finish at your local craft store and they should be able to direct you to the proper product.
BTW…I LOVE this idea and your tutorial was entertaining and very well done. Thanks for sharing! We’re doing a hand-made Christmas again this year and I will definitely be adding these to my “to do/to gift” list! Thanks!
I have four boys hence the six large boxes of photos! YES I’m going to do this & Yes I love you for it!
I love making these with black and white images and I use a heavy rag paper because I think the results are nicer. I would love to do more in color but with a bubble jet printer I find the mod podge causes the colors to run even when applied very lightly. I’m curious if you are using an ink jet or a laser printer or if you’ve found a way to protect the ink from smearing when dampened.
Krylon makes a spray finish that will seal the ink and keep it from running. Look for the one that has the numbers 1311 on the front of the label…that’s the one that seals best. Spray a light coat over the front of the picture before Mod Podging it to the tile. I’ve used this as a sealer on “zillions” of things used both indoors and outdoors and it works great!
THIS IS SO GOOD!
Thank you so much, this is the best idea that I have ever seen!
I am going to try this out tomorrow!
Hi.I am would like to ask where is the shop located for the ones that you use it.thanks..
Thank you so much for this tutorial! I used the instructions here along with a graduation flyer design that I made in Photoshop and gave it as a gift. I was able to use graphics a picture of the graduate and words to create the design and then Mod Podged it to the tile. It was the talk of the party.
Really hope I try to do this some day. If not, I at least thoroughly enjoyed reading the directions. Besides being very crunchy, you are exceptionally entertaining.
What kind of Mod Podge do you use to coat it with? There are several types… Photo transfer.. Matte.. Glossy?
I’m trying to transfer b&w photos to a tile and I bought photo transfer Mod Podge… and I don’t know if it will turn out okay..
Thanks.
I had made these before as coasters with personal pictures as well as scrapbook paper and I find that if you use the Mod Podge as an outer coat, it completely seals it and so far I have not had any water damage. However, if you make coasters, don’t forget to apply felt circles (or something similar) to the corners to prevents scratching your furniture.
If you can’t locate Mod Podge, any clear sealer should do the trick, but if you are using a photo, I suggest printing it on a thicker standard paper like card stock instead of photo paper. The ink runs much less that way and if you want a glossy effect, make sure to use gloss vs. matte!
I know nothing of modge podge. I want to use these as coasters, are they water proof? Can you make them water proof?
I have not tried to make a tile, but it seems that dipping them into polyurethane in a very well ventilated place would make them waterproof.
I love this idea. I have the photos. I can find the tiles, but I can’t find any Modge Podge where I am (the Philippines). I’ve found Gel glue that is clear and non-toxic. Can I use that as an adhesive. For a fixative, I usually use Grumbacher Matte Final Fixative which is sprayed on the surface of the photo paper.
I don’t think that will be enough to seal the photo onto the tile. There is clear acylic protective sealer for plaster or slate tile. Just tried it on one photo coaster, but that seems to make the ink jet run off a bit. Do you think the clear gel clue applied on top of the photo’s surface can do the trick?
I like to use glue thinned with water. I usually use generic school glue. I play with the consistency depending on the project. I have a laser color printer that doesn’t bleed colors but I also like the inkjet smudge. When using inkjet photos, I use regular paper or card stock but I set the printer on daily use or ink saving settings or else it runs too much. You can tint the glue if you like. One last note… For whatever reason, I have made several projects that turned out poorly. A week or so later, they aged and I liked them. You can reuse botched tiles by soaking them in soapy water
Go to Michaels or Walnart. At Michaels it is kept in several places, by the puzzles and in scrapbooking and in other places where using Modge Podge. At Walmart it is on the crafting isle and sometimes by other types of glue.
Yes, watered down PVA glue (or ‘school glue’) works absolutely fine for stuff like this. Back in my art school days it was all I ever used for my mixed media and collage pieces, and it worked amazingly well. Good old PVA..
Hey there, I really love this idea! I’m going to go make some right now… could you somehow send some of those pictures to me? Or if you’ve posted them up already, then could you let me know where I could find them? Thanks!!
Love this idea for a ladies group. Please send me some of your pictures.
I tried your sandpaper technique. Do you let the modpodge dry or do you do it wet? What grad of sandpaper are you using? I did not get a clean strip to pull off like you show in your photo.
I too am desperate to know the answer to this.
Any ideas?
this is a brilliant idea! genious!
Hi – It’s good to read such interesting stuff on
the Internet as I have been able to discover here.
I agree with much of what is written here and I’ll be
coming back to this website again. Thanks again for posting such
great reading material!!
Beautiful! Can these be sealed with a product to be used outdoors? If so, what do you recommend?
I went looking for the sticky tape squares at Lowe’s but no luck and confused the store employee a’plenty. Any chance you still have the part number / brand / exact product name? I want to do it right! 🙂
can i use the tiles on my kitchen?
Do you think this would hold up to weather outside, if for instance on a memorial?
I must do this!
Thanks, i’ll try
I have a small concrete wall area (about 10′ by 3′) in my hobby room that I plan to tile over. I bought the tiles already and will take some vacation pictures and put them on the tile before tiling my wall. Can’t wait to get started. Thanks for the info.
can you use pictures that are printed at the store or do they need to be on paper??
Oh you are just my new favorite person on the interwebs. I’m totally doing this. And I’ll have “go go go” running through my head to keep me from letting the modge podge dry before I untangle the paper from my sticky fingers and wrestle the air bubbles to not-quite-as-noticeable. I’m excited!
I do love you!!! I was thinking that the whole time- how appropriate for you to add in there! You had me crackin’ up the whole time reading this! Thank you so much you little crafty genius!
This is great and would be perfect to display wedding pictures! Love!
Great photos…great color, composition and emotion.
The images are awesome
I have so much love for this. I think I just found an awesome Christmas idea. Thank you!
Just curious, what type of modge podge did you use? The glossy kind? excellent craft idea by the way!
I just tried these last night, I made coasters on 4×4″ natural stone tiles, for my mom for Christmas (she just got a new wine bar). They were soo easy & came out incredible! Thanks, I will definitely be addicted now!!
I’m trying to make these today, and I have everything but what program did you use to crop the photos. I have Photoshop but I have to send the pictures off to be printed, and I’m afraid that they will print them, and it wont be right. Can you give me any tips.
I made mine into coasters
I’m wondering how much those textured/colorful tiles cost? The only ones I found at Home Depot that were cheap cheap cheap were white, ceramic, glossy tiles. Which is fine, but I was just wondering about the tiles and expenses and such because for some reason, the tile section at Home Depot confuses the crap out of me. LOL I’d like to be able to do this as cheaply as possible, and the tile section seems to jump from $0.13 each to $0.90 each, and I’m not sure if that’s correct. I feel so dumb in that aisle! LOL
Another tile question – your tiles are the PERFECT size at just under 4 inches. Mine are just over 4 and I had to center the pictures. Which is fine, they look great, but I’d love to do ‘full bleed.’ I’m just wondering where you got your tiles and more details about all that.
Also, another huge question – how/where do you get the little tiles?! They’re so cute, and I would love to work with them for magnets and such like that. Do they come on a bigger “sheet” or are they individual?
Any help would be GREATLY appreciated, from the author or anyone else! I found this post via Pinterest and have been sharing it all over the place. I’m obsessed! LOL I did a ‘trial run’ of 12 and I think I am going to go get a case of 100! I sealed with Triple Thick, which is water resistant (for coasters) but I love the matte look of matte Mod Podge. I think I will try some Outdoor Mod Podge for sealing, though.
Thank you!
love it! could you use them as hot plates for food on the dinner table?! or would the heat ruin it?
I think you’d need to seal it with a sealer that mentions being heat resistant. I thought about this too!
I just love her personality! As I will be moving into a new house and a new family I have tons of pictures that needs hanging, I am definitely going to try this, we love Modge Podgeing!
I’m so excited to try this! I’m thinking about hanging them up with ribbon. Do you (or any of your followers) have any idea how I could attach the ribbon that they would hold a heavy tile? Also, does it matter if the tile is “glossy”?
I thought about ribbon/ornaments, too, but wasn’t sure how to get them to hang. I mean, I’m not about to drill tiles, personally. LOL I used glossy tiles and it worked nicely!
I’m so excited to try this! I’m thinking about hanging them up with ribbon. Do you (or any of your followers) have any idea how I could attach the ribbon that they would hold a heavy tile? Also, does it matter if the tile is “glossy”?
🙁 i wish i could make these things with no flaw but i suck in making then perfect
i had such a fun time reading this! thank you it was just what i needed to brighten my day and get my creative juices flowing! thanks again!!
Nice, it’s incredible
Great idea…thanks for sharing!
I’m about 95% done! Just have to sand them.. THEY LOOK AWESOME!!!!!!
I just made six of these tiles and love them! I was a little disappointed at first because my pictures were the righ sizes so I thought I’d cut them down and let the tile show through… Well that looke plain ugly! So I painted the edges black and they look. FANFREAKINGTASTIC!
Yes, I do love you! IALSO love dOROTHY viNING FOR POSTING THIS ON HER FACEBOOK.
I love this! Making a whole bunch for Christmas gifts!
I would love to have access to some of your photos! Love the love heart one and the camera one. Also the flower ones too!
I haven’t read all comments but you could also use…say….4 of the same size tile and size the photo large enough to cover all four then you can have them as a sort of mozaic tile photo ….will be doing this very soon…may have to make some christmas presents!
they make an outdoor modgepodge that you can use if you are making coasters!
Beautiful project. I didn’t know they made an outdoor version of Mod Podge. I might have to use this to mark the plants in my garden. Thanks!
i see there are a few different types of modge podge, e.g. paper, gloss, matt etc. Does this make any difference??
could these be used as coasters?
I love it but I’m going to have to get a new printer first. Mine is just barely good enough to print out recipes.
I needed an idea for the “older” adults fro xmas and this is great. I have seen these one with fabric and scrapbook paper too which would make something fun and abstract.
Using a large plastic putty knife to go over the top of the tile for bubbles is less rough on the paper. (Used this method in adhering stuff to matte board in art school)
Also, as a photographer, I would be willing to share my 30,000 odd images with you )or anyone else) who would like them.
Yours are beautiful, btw 🙂
[email protected]
SF Herb Company bumper sticker?
I know I’m late, but the good ‘ol Stumble button brought me over. This is an awesome idea! I bet this would be super cute with Instagram photos. Weekend project! lol.
Love the idea! Now this question may have already been asked but what kind of paper did you print it on?
I just “stumbled upon” your blog. The minute I saw the tile pic DIY, I thought, “Now, that’s something I’d like to try.” Then, I read that you don’t decorate and neither do I, and neither of us like ready made decor. On top of that, I so like your blog voice. You’re definitely a share.
Now, to get to the store for tiles and Modge Podge for all of those pictures I’ve got on my computer. What a great gift idea!
I really enjoyed reading this. Hahah very entertaining AND a really cool idea. I’m gonna do this, hopefully it works out.
Great idea! I had some tiles I found in our garage when we bought the place and had no use for them. Then was thinking it would be fun to do something with photos for Christmas presents with the tiles but had no idea how. Your idea looks easy for a non-crafty kind of girl. Thanks for sharing!
I wonder if you could use a water sealant on these, and make them into a tiled backspash. That would be amazing.
My question exactly!
AWESOMELY written and photo’d post! THANK YOU!! You really did such a great job, yet kept it simple!
yes please upload some pics 🙂
Does it matter what kind of tiles you use? I’m on Lowe’s website and there are a varieity of tiles (stone, ceramic, glaze…).
Love you!! I do, I do 🙂
I’m pretty excited about this! I’m always looking for fun, inexpensive DIY projects for Christmas. Totally going to try this out!
Does the modge podge fade away after it dries on the picture? Or does it leave white streaks?
I haven’t tried with tiles yet, but when I did a picture transfer to a block of wood, the modge podge dries into a clear matte finish.
Neat!
i love this!
do u have any alternative for the Modge Podge? I live in the Philippines i dont think this is available here. thanks…excited to hear from u soon!
You can use Elmer’s white glue diluted with a small amount of water
Thank you so much for the instructions. Do you need to cover it with some kind of a sealant? I want to make christmas photo tiles to sell at a little shop that I frequent. Have a great weekend.
This is an amazing idea! I definitely will try it when I get the time. Thanks!
I just made 6 of these with photos from my wedding! I love them! My favorite part is that they’re easy enough that my kids can make them, too (which we are doing tomorrow) 🙂
Thanks for sharing was thinking about doing this my self……now I know it will work!!!! 🙂
What a great idea! Excellent inexpensive alternative to printing photos onto canvas. Love it!
thank you, i’m a photographer and just ordered 4 photo tiles online and they are beautiful. but i could make them a lot cheaper it seems, is the modgepodge a ggood clear finish on the front and does it protect from scratches / moisture? thank you so much
my tile is a glossy tile. I can get the picture on it,but if it gets wet it comes off.I need a sealer.Can you help me?I want to put scriptures on them for fathers day,
Thank you ….. I now have Christmas presents all sorted for my family & friends ! They will be stuck with my photography forever.
This is a really cool idea! I’d like to give one to my boyfriend for his desk at work. Any ideas on how to make it stand up, or make a stand for it?
Did you think about making the pictures a little bit smaller so the tile shows around the edges like a border?
Found these on pinterest and had to try them! I linked to this tutorial on my blog today.
Thanks for the inspiration!!
Kate
http://crafty-kate.blogspot.com
Terrific idea! This seems like a craft I can actually do! Thanks!
Just so you know, you can make homemade mod podge out of 50% liquid glue (any kind) and 50% water. Yea for inexpensive! Some friends and I just made some crafts this weekend using the stuff and it works amazingly! I love your photo tiles! Will have to try some soon.
LOVEE THEESE! just one thing…I actually live in Peru..and I dont know exactly what Modge Podge is..well is glue OBVIOUSLY, but i mean can it be like just the regular white glue? the one they use at school or what?
you could purchase tiles at the “Re-Store”. we have them here in Canada where ppl take excess constructions materials, and all the proceeds go to Habitat for Humanity. Usually a wide selection of tiles there for very little cost!
We have one of those here in Idaho too. It’s awesome to get a deal and have it go for a good cause!
Awesome tips 🙂
I did just that today, bought 6 4X4″ tiles and 3 8X10″ tiles for 2 bucks. Since I have a printer and mod podge, I’m making Christmas presents for almost nothing this year.
Yes, yes, yes, Please!
Oh my goodness you just gave an idea I had the wow factor I was searching for. I’m fairly new at DIY things but so addicted in this short time span. Anyways I was thinking of refacing my coffee and end tables with mosaic tiles but now i definitely know that I’m going to make picture tiles and reface my coffee table with those. So since the pic tiles won’t be hung but rather on a table where a variety of things can spill will the Modge podge protect it or is there something else I can paint over them as well as the Modge podge for spillage protection?
Modge Podge is a water based glue. Although an attractive finish, it will not protect what is underneath. Since it is water based it will take a top finish like lacquer or varnish without causing a chemical reaction. Lacquer is a clear finish not changing picture colors. Varnish will age giving pictures an aged sepia tone look.
Modge Podge is not a smooth coat; brush strokes show. This will help create a linen canvas appearance. When applying to picture front, brush horizontally and before that dries brush stroke vertically.
When securing picture to tile do not press too hard and squeeze out all the glue. An old credit card makes a good squeezer.
To prevent colors from running spray picture with fixative/sealer. Often this is displayed with spray paints.
Tip: I just made these, I used photo paper and did not have to push out air bubbles cause there weren’t any.
Oh and I would LOVE some of your pictures too! Thanks
I saw somwthing similar to this before with greeting cards but it was much more complicated and not nearly as personal and fantastic. Thanks for another great idea!!!!
Found you through Pinterest – thanks so much for the tutorial! These tiles were the first project for our “Pinny Party” and they turned out so great.
Yes, I love you 🙂 Thank you!!!
I made some of these last week! They are super easy! I trimmed down my photos smaller and put some fabric behind one picture.. Turned out really well! On another, I also trimmed it smaller so part of the tile was showing and sprinkled gliter on the tile parts(:
Love that you got creative with it.. I want to try that too! Thanks for the suggestions/encouragement!
This is a simly fantastic idea. Not only do i love it for my use in my home, but also as gifts! I love that thosis easy enouh for kids to do too, though some may need more supervision than others.
I would love to use some of your pics as well as my own .. especially the one of the heart hanging down. That would make a great Valentine gift for my friends! Thanks for ALL of your awesome ideas and recipes … I’m just getting started but I hope to be real CRUNCHY in the very near future … taking it one day at a time! Plus, I have started a group with some of my girlfriends and told them to invite their girlfriends. We’re learning to do things for ourselves … saves money, it’s fun and better for us! Plus it’s great getting together once or twice a month to play!
omg…i tell myself every year to start early with the gifts..now i will save hundreds by dong this with the tile..my mind is racing with ideas..coasters..magnets….what a great idea..thanks for sharing and good luck to all!!!..
Have enjoyed reading your post tonight. The look so cute. I would like to get a set you have enough to go around. Have a zillion of puctures I can choose from. Getting excited to start.
I love working with Modge Podge or elmers glue when i decoupage. After reading many of the comments I noticed that no one has mentioned using hairspray (in a can) on the pictures. Spray the pic, let dry, continue picture tile process.
Oh, I can’t wait to try this! I’m always looking for different ways to display all the photos I take. I’ve bought so many frames at Savers, I’ve used most of them, but I’ve got stacks of them piling up….I’ve wanted to find something a little different and I do believe this is it! Thank you for the tutorial!
I just found You today! Absolutely LOVE your idea and will be trying it out Today 🙂 I agree with the other comments here… You’re idea is GREAT — really fits the bill!!
love this idea. I would like to see more of your pics.
I really like this, the idea is original and unique I have not seen anything like this before, and I think that it is not difficult to do. I will certainly try to do.
http://govart.com/hardware_hangers_A.html
This kind of hardware can be glued to the backs of things with E6000 glue (available at WalMart and anywhere crafty) and will make your tiles easy to hang. I have used these to hang plates. 🙂
I made some! Gave as Christmas gifts and they were loved!
http://www.bluecastlewishes.com/2011/12/diy-picture-tiles.html
I LOVE this idea and want to make them as coasters. Does anyone know what I can put on top after so water doesn’t ruin them?
Yatch varnish or pavapol will make them waterproof and hardwearing
Totally what I was looking for! This is what all the Grandparents will be getting for Christmas this year!!
Oh, my, my brain is buzzing now…. Wouldn’t the grandparents love these with pics of my kiddos… and maybe even a couple with the kids’ own artwork on them??? Such a great idea for gifts in time for Christmas! Thanks so much!!!
omg.. what a grand idea!!! I’m a preschool teacher and always looking for new ideas for presents for parents for Christmas..Mothers Day..Fathers Day!! What a grand idea!! Plus , I have a bunch of leftover tiles from a kitchen project!! Woo Hoo, I’m in business!! heehe
Thanx! I just got an order of digital prints..all scenics for homemade cards and didn’t want to waste the little proofsheet they stick in with it…thought maybe magnets instead and you have helped me to know how to do it! So thanx!
LOVE this! Can’t wait to try it!
Hey can you use regular pictures to do this?
You are a crafting genius Crunchy B. Thanks for the tile picture idea. I made some and I. LOVE. THESE. THINGS.
I would LOVE some of your photos for me to copy and try! I don’t have a website but I have a business on fb called Occasions by Rachel and I am always looking for new stuff to do! Thank you so much!!!
Rachel
How artistic. I love this, I’m so glad I stopped my Stat’s homework to look at your blog and mess around 🙂
Hi,
I really like the idea of the photos on the tile. Can you upload some photo for me to copy some and try them please
Thanks
I would just like you to know that I think you are fantastic. I came across your site and so far I have went no ‘poo going on 3 weeks now (hair is still in greasy phase but getting better), I made a body oil from coconut oil and orange, I do the honey every night, I even bought the diva cup! I am well on my way to full on crunchy!
So, on to this idea… this is brillant, I love the vintage look of the pictures. I am so excited to try this when I get a few extra dollars. Thank you so much for all your inspiration! 🙂
LOVE THESE! I printed the pictures on transparent tracing paper, which gave me a softer image and let the tile show through. Also, put the modge podge on the tile first and let it dry, then ironed the image on to the tile. Much easier than trying to get the wet paper centered on the tile.
Ok so how did u iron it on, did you cover the paper with something first
That is such a crazy good idea. I too am not gifted with the creative decorating gene. But I have, for so long, wanted to do something with some photos I have taken. I love photography and have travelled quite a bit. Thank you so much for such a great, great, great idea….I have one question for you. What is Modge Podge and where can I find it?
Awesome idea! Didn’t really work with photo paper, but the regular stuff looks awesome
I do this with my digital scrapbook pages from Heritage Makers! And I use one part water to three parts white glue as a mix instead of modge podge…I’m cheap. Not sure if that’s any more crunchy, but at least I didn’t have to run to the craft store. Definitely use a sealing spray if you’re making coasters! And yeah, these are the coolest.things.ever.
(and I would looove to have the bees posted….) 🙂
Ok got another question…if you make them magnets do you place a whole magnetic strip on the back to cover the entire block? And Do you use the Mod Podge to get the magnet piece to stick to the tile?
love love this project!!!
Ok from someone who has never heard the term before – what is modge podge? Is it just white glue? or is it more specific than that?
Are the photos printed on photo paper or just regular paper? Such a neat idea!
Just regular old paper. I’m sure using photo paper would result in a sharper photo – but I didn’t want sharp. I LOVE the small amount of bleed-through of the ink and the way the ink sort of “smudges” around VERY slightly when you brush on the Modge Podge. Gives them a total painting feel instead of a “sharp photo” feel.
WOW Crunchy and CREATIVE!!! I knew you were the coolest, but seriously this goes beyond!! I love it…I have this stash of tiles I picked up on the side of a construction site – they were marked “free” so I couldn’t resist even though I haven’t done anything with them in over a year. Now I KNOW what I’ll do…photo tile holiday gifts for everyone!! YAHOO! thanks you just saved me a ton of stress!! 🙂
thanks i’m gonna do this when decorating my room
love, Love, LOVE these tiles! I would be interested in your uploaded images. My photography skills are limited to kids and grandkids these days. BUT I am going to do a grandkids photo collage with this idea. I hate cookie cutter framed collages. I’m also going to do some for Christmas gifts!
Best Idea EVER!!!! I’m so super-duper excited I’m using stupid words! This will be a Christmas gift for like EVERYONE!!!! I saw this on Tip Junkie and glad I looked! Can’t wait to get started!!!!!!!!!
You can also Modpodge those cheap picture frames! But this idea is going to be a huge hit! Like sponge painted wall 😀
Awesome idea… Especially for school kids to use for mother’s day and such! I absolutely love this idea. I also have a ton of tile! Thanks so much.. And, for pictures to see what the out come should look like!
This is absolutely brilliant. We just bought a house and I really have no idea how to decorate it. Actually I don’t know how to. Lol. All of my pics are on my computer too. I am just so tickled pink to have found this tutorial. You rock! I’m thinking these will make GREAT Christmas presents too.
Thank you. Thank you.
Ok, I am not crunchy. Not one little bit 🙂 Sorry! But I love your tutorial. Super clear directions. Can’t wait to try…
Anyone ever tried this with leaves from trees, or something like holly leaves, on tiles? Just wondering if the leaves would retain their color and structural integrity once ‘podged.
Beautiful, beautiful! Thanks so much for sharing that great tutorial…you answered every question that was running around my head 🙂
PS: stopping by from tip junkie…just saw this on Facebook….now I’m off to go show you some Facebook love too 🙂
This is so exciting to me! I’m a bit craft-challenged – but this looks like something even I can master! Can’t wait to give it a try. You’ve given me a whole new spin on gift-giving. Forget those ugly thrift store frames!
I think it would be great to leave a little border of tile showing around the edge of the picture. Just cut the picture smaller. Now I’ll have to start printing off tons of pictures. Three years worth for the kids alone. Oh dear. Well, I have a good head start for Christmas presents this year. 🙂
I love the idea of sticking ‘stuff’ to the tiles along with the picture, too. A beach scene with a couple of shells, a bush scene with a pretty leaf, etc etc.
Finally I have a reason not to be so angry about all the tiles falling off the walls in my bathroom 😀
My friend and I have a habit. She’s a photographer, so I never have to carry a camera, but we go to the beach every year and make a huge deal out of collecting tons (TONS) of small seashells. Then we go to Goodwill or S.A. or random yard sales and buy the CHEAPEST picture frames we can. Then, we spend an entire weekend covering all the frames with those pretty, tiny seashells (and glitter, feathers, flower petals or whatever else we think we want) and VIOLA! Lovely, homemade, picture frames.
Plus, all you need is (FREE) pretty-looking slightly shiny things, and glue. Oh, and some pictures lol.
So, I just did this with watered down elmer’s glue instead of Mod Podge, and it seems to work. I had a random tile here, and I was too excited to wait to get the proper items. :0) (Daughter is napping) Anywho… I was also thinking of doing this above my sink which is tiled. My only concern would be how to remove it if we decide to move. Any suggestions on how to remove it before I begin this project?
You are, undoubtedly, the cooliest! <3 I cannot wait to try this!
Aside – I noticed the comment above, and it worked for me. (And I didn’t realize I wasn’t already a fan on FB! Crazy talk!)
Ha! Crazy talk, indeed. Not that we need one more place to “kick it old school.” (That made me feel really old.)
Too funny! Yes, but I’ve found that I don’t surf my blogs like I used to unless I see a post on FB or Twitter. I do come back to my faves once a month or so to catch up, but it’s not the same. 🙂
I actually made those as gifts for my bridal party. Totally not crunchy – a kit from a scrapbooking store, but lovely and unique and cool anyway. 🙂
This is slightly off topic, but I just discovered your blog today, and I want to follow you on Facebook. I can’t seem to though. I clicked the button on the right, but it just redirects me to Facebook home page, and when I searched Crunchy Betty on Facebook, you didn’t appear to be there. Am I doing something wrong?
Hi, Grace. I’m not sure what that’s about, because the link goes directly to CB facebook (http://www.facebook.com/crunchybetty ), but I’ve had one other person mention that weirdness before, too.
I think it might be something within Facebook that gets wonky. The problem was solved before by me giving a direct link to it via email, so hopefully it works via the site. Lemme know if it doesn’t!
Well there is Christmas sorted! I always make homemade gifts and was stuck for an idea for this year! DONE! Thanks for the awesome idea!
Great idea. I just bought my first bottle of mod podge last Dec. How did I live without it?
I KNOW! I saw this sign on Pinterest a few weeks ago that said something like, “With Modge Podge, I can do ANYTHING!”
And … that’s how it makes you feel. Sigh.
OMG! I did something really similar to this for my daughter’s nursery – used mod-podge to attach scrapbook paper to wooden letters spelling her name to hang on the wall. Now I have something to do with the rest of the mod-podge!!!!
Dude, seriously. After you did those letters with scrapbook paper, didn’t you kind of just want to Modge Podge scrapbook paper on EVERYTHING? It’s SO addictive! If I could Modge Podge scrapbook paper to my stove, I would do it.
Even if I don’t use your pics, I’d love to see them. You are such a crunchy Renaissance woman! I can’t wait to try this idea for a wall in my house I was stumped about decorating…and as Christmas presents…and for my kids’ rooms…and…
Did you use a laser or inkjet printer? I have had problems with images bleeding a lot from my inkjet printer when using mod podge. But if I copy them with a laser printer or toner copier I am ok. Also, you can transfer images with oil of wintergreen if you are looking for a more crunchy way. Look up solvent photo transfer (I think). But mod podge is MUCH simpler & less stinky. 😉
Mine’s an inkjet. There’s a small amount of smudging (you might be able to see it), but it’s not bad. And, really, I think in this case it’s GOOD. I like the slightly dreamy effect it gives to the whole process. Makes everything look a little more like paintings than super sharp photos.
I am SO going to look up this wintergreen thing. I have a bottle of wintergreen EO that I never know what to do with. THANK YOU for the tip!
I made some photo blocks for Christmas gifts last year. I had hubby cut blocks slightly larger than my 4×6 photos (the wood was only about an inch thick, or so). I painted the blocks black and sanded the edges. Same as how you Mod Podged your pics on… just slather it on, put on the picture, then seal the top. Voila! We did “grubby” family photos last year of us on some railroad tracks (hubby and son had their skateboards and saxophones and daughter had her electric guitar). They turned out great.
I’ve even seen people do the photos on slightly thicker wooden blocks and attach a pretty glass drawer knob to the top. Very shabby chic!
Love this idea! It reminds me of a conversation I had with my mom yesterday about how you could totally take this concept and move it over to making personalized blocks for little kids. I think she’s doing that for my niece.
I gotta figure out how to do the glass drawer knob too. Although, I have this weird feeling that knob hunting could become addictive. Weird, yeah?
You are like the effin gift that keeps on giving!!!!!!
I just texted my sister today asking what she wants for her upcoming b-day…..Yup she’s getting this.
I love that the tile gives it more texture and depth than a plain picture frame. I’m all over this 😉
Perfect timing! I was just talking to my mom last night about printing out some photos to give to her for her walls. Might have to make a few of these as well.
I’m going to try this with my toddlers artwork. he’s always coloring or painting something and now I have a better idea of what to do with them all besides magneting them to the fridge and having them fall off whenever we open it.
I’m definitely thinking Christmas gifts for the grandparents. I’m betting they are going to get all teary. Thanks!
You are a brilliant!!! Love the idea for toddler’s artwork!
This is awesome!!! I adore the flower pics in this post, and that sunset one is beautiful! I would totally use those!
This is SO great! I love the way these turned out and I want to make a bunch of them right now… this very minute. They will make awesome gifts.
If they’re going to be handled a lot (like the magnets), I might throw a coat of polyurethane over the top (not crunchy – but makes for a more durable surface).
Chalk up another vote for your bee photos… they were stunners.
Is it a coincidence that I was doing crafty stuff today before reading this??? I THINK NOT!
I ADORE this idea, especially because I can turn it into a magnet! And I have TONS of Mod Podge in my craft corner.
Ooooh, I bet I could make something 3Dish with this technique using my collection of can tabs and bottle caps! That would look awesome, I think. Oh, now I’m all excited, and I want to start right away… but I have to go to work! T_T
Can you tell I love crafty stuff? Blame my years as a Girl Scout. Ah, those were the days… 😀
~Ness
You’re going to have to teach me a few things, lady. I want to be more crafty SO BADLY, but it turns out the only crafts I’m good at are the ones that involve cutting paper and gluing it to stuff. Ha.
What a fantastic idea! I love it! This is going to be my Christmas project this year and if all goes well I am going to do it this weekend!
Thanks for sharing….
This is a great idea for personal gifts to family members and friends. I can’t imagine a grandparent that wouldn’t be thrilled to have a whole series of family picture tiles.
LOVE this! I will have a reason to get all those images off my hard drive too! Displaying your pics for everyone to enjoy is part of the great joy of taking pics!
Thank you for the amazing and economical tip! Bye bye over-priced frames!
SO true. I had no way to precisely price out how much these things cost (with ink costs and Modge Podge costs), but I’ll betcha a soda bottle top that one of these – all total – is less than $0.20 to make.
Hello, bank account!
Now, I know what to do with all these great Instagrams! Thanks!
Ohhhh…your pictures of the bees would make beautiful artwork. My vote is for those pictures!
Ok, you scare me! I have been looking for some DIY projects for the home, fun, kids, and gifts. This seems to fit all of those bills. I want to try it right at this moment… but maybe I should keep studying for my final exam… hmmm, you’ve put me in quite the predicament! -__-
Awesome idea! More posts like this please!!!! 😀
YOU BETTER HAVE STUDIED, YOUNG LADY.
Or, rather, you better have done some picture tiles, young lady, if you were going to slack. Good luck on your exam!
Perhaps you will enjoy perusing this site. I’ve yet to buy anything but really enjoyed the pottery and paintings. You may get some ideas. I got a really big immature kick out of the shower curtains… http://www.etsy.com/listing/57853538/the-thinker-shower-curtain-rodin-auguste?ref=cat3_gallery_3
Have fun 🙂
etsy.com
Ha. Ha ha ha. I could look through these all night. My favorite was the Buddha wisdom eyes one. As much as I’d love to be irreverent enough to put up a half-girl going down a toilet … I’ll just keep laughing at it from a distance.
Talk about NOT mass-produced home decor. Too funny.
I just recently found you and already I love you! Also, will soon make your sorta ‘poo (thanks for that!). And now I have to go buy tiles… and figure out how to resize photos…
Woot! If you have any questions about resizing, don’t hesitate to ask. Although the only photo editor I know very well is Photoshop … so …
And good luck with the no ‘poo. Cannot wait to hear what you think of it (don’t forget the aCV rinse, too).
Mwah!
Hell. Yes.
I am doing this as soon as possible. I have TONS of wall space and have been dreading spending toooooons of money on picture frames (and they probably should match?). This is awesome and I could even let my 5 year old son help.
Thank you!
(I’m linking to this on Pinterest because it’s THAT awesome).
Thanks for the pin, lady! I think one of the reasons I’m so “eh” about picture frames is not wanting them all to be black (and not wanting any of them to be wood or metallic), but being SO afraid that a colored frame would be hard to “match” with a photo.
This just takes that issue off the table completely. Ha!
I totally love this idea and am thinking ‘Christmas presents’. Do you think the Modge Podge would make these tiles durable enough to use as coasters?
I toyed around with the idea of making coasters with the same method for our wedding favors last year. We made a few & decided it would be too time consuming for 100+ people. But we made a few, we just sprayed them with adhesive (ya know, from the aerosol can). The mod podge alone left kind of a sticky layer on top but the adhesive dried perfectly clear & without the stickiness.
Oh, and definitely add felt on the bottom of the coasters so you don’t end up scratching up your tables etc. That could be bad…very very bad 🙂
Great tip! So, they have held up to sweating glasses over the past year? I think these personalized coasters would be so cute for my family, as long as they hold up.
Yeah, they’ve held up very well for us! We did use 3 or 4 coats of the mod podge under the adhesive for some extra protection though, I think that helped a lot. Oh, and you can also use plain scrapbook paper that matches whatever room’s decor, we did some of those for gifts & the recipient loved them.
I make tile coasters. I started with MOD podge and very soon discovered that it was not durable Enuf and left brush strokes. I use apoxy. It’s more expensive but it’s great for so many things. Go check out My fb page LENAS custom crafts and u will see how the apoxy looks. Very shiny and waterproof and durable.
O-M-G!!! I love this! I am pretty sure this will be all over pinterest VERY SOON. If I was able to pin it at work, I would.
You speak words from my own brain sometimes. I bought my house about 9 months ago and I’ve barely decorated at all because everywhere I look I just see cheap, crappy, mass-produced sh*te. It kills me!
And yes, even picture frames! I’ve been thinking I might go to the tip-shop (not sure what you guys call it over there…?) and grab a bunch of old busted frames and maybe paint them all one colour or something, so that the style is in the repetition rather than the, um, nice-ness of the frames? (Maybe I better stick to my day job).
Anyway – AWESOME idea and thank you thank you thank you for helping me think outside the box with decorating 😀
Heh. I love the idea of painting picture frames. I have SO far to go in order to paint things in an interesting way. When/if you do them, you HAVE to show them to me for inspiration! Go go go!