A few months ago a friend of mine was chatting with someone else and mentioned me as her “crunchiest” friend. Intrigued, her companion asked, “What do you mean? Like, she only buys organic and recycles everything?” “No,” my friend said, and leaned in for the kill. “Crunchy, like, she makes her own yogurt.”
For whatever reason, making your own yogurt has been put on this hemp-woven pedestal as the ultimate – but unachievable – in living a healthy, sustainable lifestyle. Too many people I talk to say it’s something they’d never do because it’s too (and pick one here): hard; expensive; time-consuming; boring.
Well, you might have me with the “boring” because most of making yogurt is as exciting as watching low-VOC paint dry. But hear me now and believe me later: making your own yogurt is cheap. Cheaper than store-bought. WAY cheaper than store bought, with the added benefit of you having 100% control over the ingredients. The processing time is long, but the actual prep time is quite reasonable.
And as for hard? Listen, I have a friend who I will kindly call kitchen challenged. When her husband goes away on a business trip for a few days, he makes a large pot of chili and leaves it in the fridge so his children won’t starve in his absence. I do not make this up. And this friend of mine? Makes yogurt all the time. I have taught her, and I will teach you.
Step this way, Young Grasshopper, and let’s get started.
But, you say to your screen, don’t I need a fancy yogurt machine?
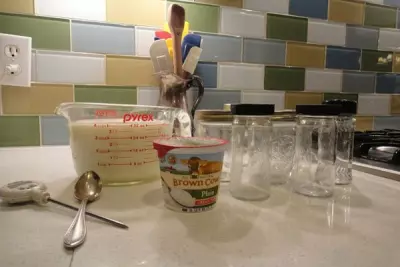
NO, I shout back to you magically, You do not! You can certainly use one if you’re getting married and have an empty gift registry to fill, but you do not need one. At all. Here’s what you do need:
How to Make Homemade Yogurt
- Milk. You need four cups here, or one quart. And listen, I hardly know you, but I’m begging you, please use whole milk. If you absolutely MUST use skim milk you can add about ¼ cup nonfat milk powder to help thicken it after it’s heated, but trust me here. Use whole milk. This is the good, healthy kind of fat. You can even, if you’re feeling decadent or have some left over from another recipe, use heavy cream as all or part of the milk. This will give you that nice “cream on top” yogurt that tastes just like dessert. Dessert filled with happy, hard-working probiotics.Obviously I’m going to recommend you use organic or at least hormone-free milk, ‘cause that’s how we crunchies roll. Now, I have on occasion used my non-homogenized, low-pasteurization milk to make yogurt, and with only mixed results. It spoils within a couple days, or never really sets up, or something. I don’t know exactly why, and you’re welcome to give it a try. But since you’re going to be cooking the milk anyway, thus cancelling some of the nutrients you get in the raw milk, feel free to use homogenized, pasteurized milk here and save some cash, keeping the raw milk for the drinking. Totally your call, though.
- Plain, whole milk yogurt. Yes, you heard me, in order to make yogurt you have to buy yogurt. You’ll only need about a tablespoon to use as your starter, so buy a small cup and eat the rest. Please, please, for the love of all that is Crunchy, make sure it’s plain (NO vanilla or fruit flavors – we’ll talk about flavoring it later, I promise) and whole milk (trust me) and with the most distant expiration date possible; you want those live and active cultures to be in their prime, not in a probiotic nursing home.
- Jars. Go crazy here. Half-pint canning jars are great; small rinsed-out jelly jars; I even use large glass spice jars. You’ll want six to eight of them, and they need to be clean and dry.
- A cooking thermometer. This is not essential, but quite handy as you try this the first few times. You’ll see. I do have several friends who do without one, though – including my kitchen-challenged friend.
- Some sort of pan or casserole dish with an edge. Again not essential, but it does help with the transportation of the jars. I use a 9 inch square but it really doesn’t matter.
Let’s get to it.
Get your pre-made yogurt out to come up to room temperature. Measure out a quart of milk. In a large saucepan, heat it on medium heat. Heat it too fast and it’ll scorch, so don’t crank it up impatiently to try to do this faster. Trust me.
You want the milk to reach 180-185 degrees Fahrenheit; if you don’t have a thermometer, the milk will be about to boil but not boiling; it’ll start to have almost a shine on top of it, heading towards a skin. You want it hot enough to kill off some bad stuff, but not so hot it kills the good stuff. And yes, that’s the scientific explanation for it.
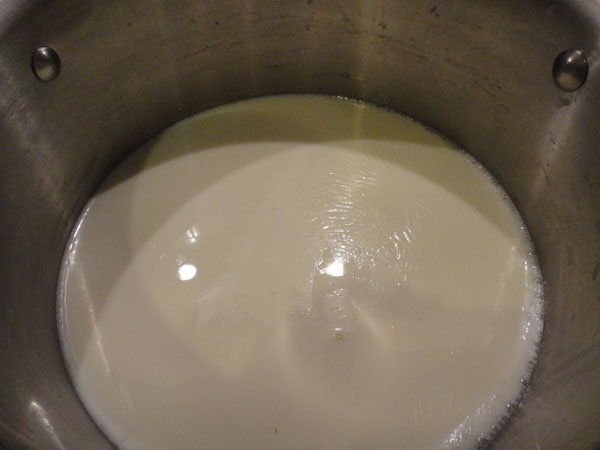
Once the milk has hit the right temperature, pour it back into your measuring cup or bowl or what have you to cool. You can leave it in the pot to cool but it’ll take longer. Now you sit around and just wait, so I hope you brought a deck of cards. Left out on the counter, the milk can take a couple hours to cool. You can put the measuring cup into the fridge to cool faster, which will get it down to an hour or less, or you can speed things up mightily with an ice bath. Think of your milk as fever-ridden, needing to cool off quickly. Wrap it in ice! Stat!
Seriously, put the measuring cup or bowl or whatever in that handy brownie pan you’ve got ready: add some ice and water, slide it in the fridge, and it’ll cool in half an hour or so.
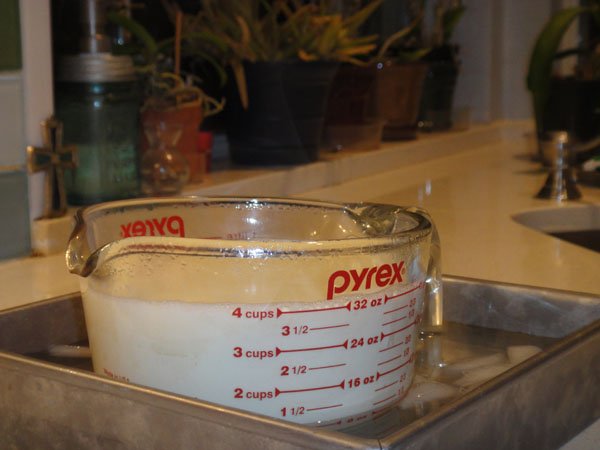
Who cares how long it takes to cool, you ask? I guess just someone who realized she was out of yogurt and foolishly began making some at 10 o’clock at night and couldn’t go to bed until she’d gotten the $#@% yogurt processing already.
For example.
So your yogurt is cooling. Now, I cool my yogurt to about 75 degrees Fahrenheit because back when I used freeze-dried starter that’s the temperature they recommended. I’ve read several sites on making your own yogurt that say you should cool it to between 90 degrees and 110 degrees; Stephanie at Keeper of the Home says to have it slightly warm but not hot, to where you can comfortably put your finger in it. See how laid-back and easy this all is? Basically you want it warm enough to activate the probiotics (wake their lazy hineys up) but not so warm you kill them (seems a kinda harsh punishment just for sleeping on the job).
Once your milk is optimum temperature, add a spoonful of yogurt – about a tablespoon (again, laid-back! Easy! Completely non-stressful!) – and whisk it into the milk to spread that probiotic goodness all around. Now they’re Live! And Active Cultures! Coming soon to a kitchen near you, and ready to sing and dance for their suppers.
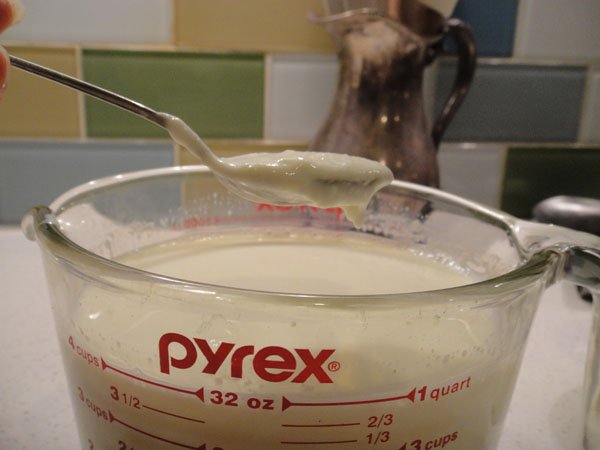
Once your yogurt is thoroughly mixed and happily singing show tunes (no? Is it just me?) you can pour it into their storage jars. Fill the jars evenly, as much or as little as you want – go crazy! Then stack them in your now-empty pan for processing, leaving the lids off.
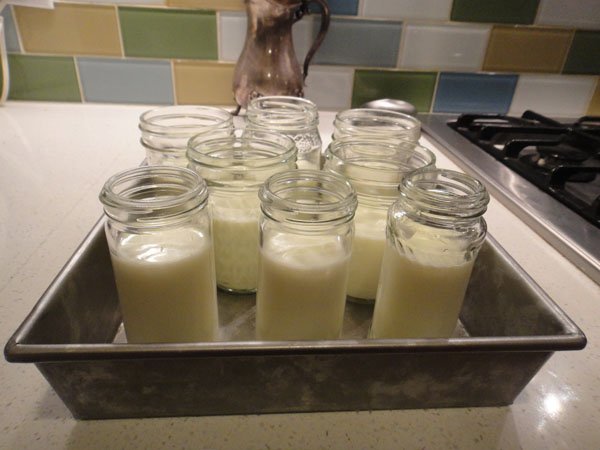
Place your jars in your oven. DO NOT TURN THE OVEN ON. This is just providing them a safe, stable environment in which the probiotics can feel free to express themselves. Turn the light in your oven on to give them a little heat (and a night light, you know, just in case), cover the tray with a towel for a little extra insulation, and close the oven.
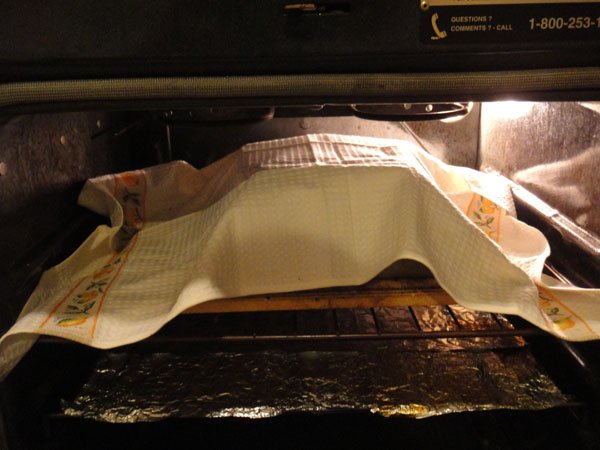
Then walk away.
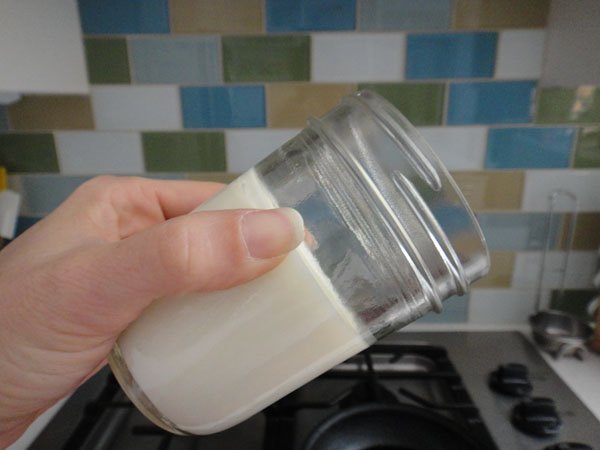
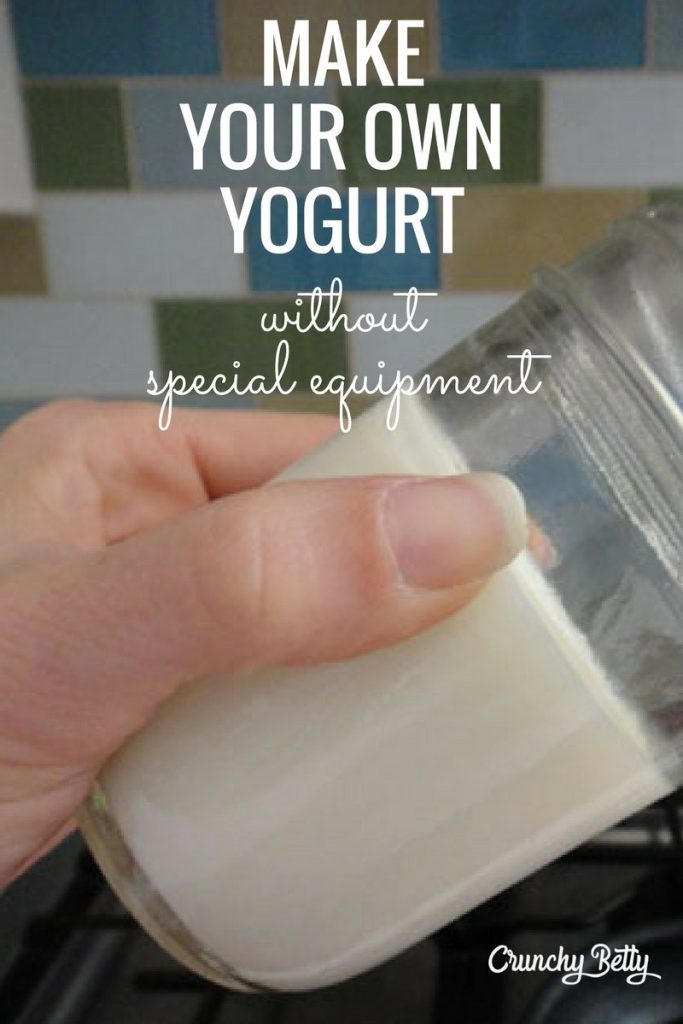
Paint a picture, make a salve, rearrange your sock drawer, then find something else to do for many more hours because these babies need about fifteen hours for the transformation to be complete. So I make them at night, get them in the oven around 6 p.m. or so, and pull them out after school drop-off the next morning. It’s not a precise science, so don’t freak if you leave them an extra half hour or have to pull them out sooner – but leave them alone for a while. The probiotics are shy and want their privacy, and the yogurt won’t set if you keep jiggling them to see if they’re done yet already. In the end, you want a jar of yogurt that doesn’t slosh around when you tilt it thusly –
Once they’re set, put your lids on those bad boys, throw them in the fridge for a few hours, and they’re ready to eat!
Now listen, fellow crunchers, this is going to be tart, plain yogurt. So don’t wrinkle your nose if it doesn’t smell like vanilla on a spring day. But it should look like regular yogurt, and if it’s runny and doesn’t set then you probably added the starter while the milk was too hot and killed the probiotics. But I won’t call the microbial police if you don’t, I promise. And if it smells super-weird or turns, I don’t know, green, then just, you know, don’t eat it. It should taste like store-bought plain yogurt. But better. Much, much better.
What can you do with this yogurt? We eat it – a lot – with homemade granola in the mornings. We also use it a lot in smoothies, or in baking. The plain yogurt also makes an excellent, tenderizing base for a meat marinade – think curried chicken. I have even been known to put it on my head as a wrap to balance the yeast on my itchy scalp. And of course, Crunchy Betty has that awesome strawberry-oatmeal clarifying mask with yogurt in it.
But if you tire of the plain yogurt, the mix-in possibilities are endless, and perhaps I’ll come back another day to talk about how to make some of my favorite fruit mix-ins – what I send my kids to school with and such.
So that’s it! You’ve crossed the finish line and earned your Advanced Crunching merit badge. That wasn’t so hard, was it? Now raise your hand and repeat after me: “I (put your name here) pledge to try to make yogurt. I pledge to save money, and nourish my body, and gosh darn it, have fun doing it.”
You’re in the club. How does it feel?
Now, for those of you who already know the make-your-own-yogurt secret handshake and have been doing this for years, what’d I forget? Any favorite tips you’d like to pass on?

 Your Mini-Guide to Removing Stuff From Other Stuff
I needed to thank you for this good read!! I certainly enjoyed every little bit of it. I’ve got you bookmarked to check out new stuff you post ebfdbdaadaed
Can I make Goat’s milk yogurt this way?
heee-larious. so much fun to read this.
In the interest of being all fair-like, I wanted to let you know that I’ve blogged my own post about making yogurt that I learned from this very post. I gave you a shout out since it was your awesomeness that got me off my butt.
Thanks again for teaching me how! It’s been life-changing.
This looks like the easiest yoghurt recipe I’ve come across so far! My first thought before giving this method a go is if it’s really safe to leave the lids off (bacteria wise)?
I’ve just made my 3rd batch of yogurt following these directions and I’m hooked. Well, ok, I was hooked after the first batch. But I have to say that following the advice of Keith who posted in the comments below, I held the milk at 180 for about 15 minutes before cooling it and it made a thicker yogurt the second time around. I was a little stumped about how to flavour it but now I just chop up a bunch of fruit, stew it over medium heat with about a teaspoon of sugar (to release some of the juices) and stir it into the finished yogurt. Today we had strawberry mango blueberry yogurt. Can’t buy that in the stores, my friends! Thanks for the inspiration, Betty, and the awesome post, Jennifer!
Yay! Thank you!
Has anyone ever tried to do this with coconut milk or soy milk (preferably coconut milk)? My daughter can’t even drink lactose free milk.
I have to ask, why just whole milk? I’m newer to the crunchy thing, but I thought the saturated fat in milk was still a ‘no-no’? I use whole when I make it for my kids, but for the hubby and myself I stick with 1%…
i had this same question recently in my new health food journey. i highly recommend the book Nourishing Traditions to change all the previously held “no-no” ideas. (i had tons of them that are incorrect!) in the book she talks about how the “politically correct dietary gurus” will tell you that saturated fats cause cancer and heart disease, but she then takes you on a lengthy journey of other cultures around the world that eat diets high in saturated fats and have great quality of life and long life span because of it. she has a large list of reasons why saturated fats play an important role in your body – i highly recommend this life changing read!
I have a strange question. My baby has a dairy allergy, but he doesn’t have any problems with breastmilk. Has anyone tried to make breastmilk yogurt for their baby? Would heating the milk up to such a high temperature kill the nutrients in breastmilk?
http://voices.yahoo.com/how-breastmilk-yogurt-2526034.html this is close to how I do it, I don’t bother with the cornstarch though…hope this helps.
I made two batches yesterday. It is delicious! The second batch I put right into the jars and heated the milk in them and kept at 180 for 20 minutes as per Keith’s suggestion, then I put them in a dish and poured boiling water in and put them in the oven. I also turned the oven on to warm for about a minute. This morning the second batch is perfect. I will do this from now on. It is easy and the results are to die for!
I don’t have a thermometer…how warm by touch do I need to cool the milk before I add the yogurt? Lukewarm, hot, bath water warm?…
My hubbie drinks lactose free milk. He was eating soy yoghurt, but the brand he liked stopped making it and he didn’t like the taste of anything else (plus they were VERY expensive). I said ‘that’s it, I’m making you yoghurt out of lactaid milk’ and it could be easier. I use a 4 quart crockpot. Pour in 1/2 gallon of milk. Heat on low for 2-1/2 hours. Turn off and leave sit for 3 hours. Then open crockpot and stir in package of yoghurt starter (I buy mine from King Arthur Flour). Put lid back on and voer crockpot with heavy towels or blankets overnight. Viola, smooth creamy yoghurt in the morning. I bought those 1 cup ziplock containers with clean bottoms and blue lids. I put frozen fruit in the bottom, then the yoghurt, then a teasppon for my homemade jam on top. I stack them in the fridge and my honey has the regular ‘stir up from the bottom’ yoghurt experience. He LOVES his new yoghurt.
Love this! I make the stuff in the crockpot too; I have mixed results, sometimes it’s thinner than others. And I usually do use 2% milk and then add powdered nonfat milk, which creamys it up a bit. I generally save about half and then strain about half to make greek yogurt or even “yogurt cheese” (straining it even more, till it’s practically cream cheese-texture)…
I didn’t know yogurt-making was “ultimate crunchy.” Wow, I feel so…granola!
Oh. My. Gosh. This yogurt is so yummy! And easy. The only reason I will buy store yogurt again will be for the active cultures.
My yogurt took a little longer to set up. I got busy with the kids, and I think the milk cooled down just a tad too much. It still worked, though, and I will definitely be making it again, so we’ll see if I can do it better.
Does anyone know if you can use the homemade yogurt as your live culture? You could use your own yogurt as the starter, kinda like sourdough starter. That would make it even cheaper to make.
the way i make yogurt is very similar except for one thing, and this one thing might make you go :O!!!!!!
the sure-fire way to heat your milk and never get it to scald, plus dirty fewer dishes (i haaaaaate washing big pots in my tiny sink) – put all your milk into your glass containers first, then put your containers in the pot. fill the pot with water and boil it – this acts like a double boiler plus your milk is heated in its own future yogurt container. you just add the appropriate amount of starter to each container and everything else works the same :]
of course by “fill the pot with water” i don’t mean the whole thing. usually just about halfway up the side of the jar. if you are afraid your jars will knock together, you can lay a small dishrag or wash cloth in the bottom of the pot.
I generally find that the yogurt tastes better and is not as tart when it sets for less time. Generally I only leave it for about 8 hours, though I do use a bit more starter. If your yogurt is to runny, you can also put cheesecloth over the top of the jar and let it strain upside down for a while to get a thicker yogurt.
I am nervous about making homemade stuff like this but this was so easy and came out wonderful. I just mixed in some sweetened strawberries and my picky bunch ate it up. I love yogurt but can keep it on hand enough and it cost too much. I will be making this very often now and will even try some of the suggestions in previous comments
Does any one know if lactose free milk will work for yogurt? A friend gave me a half gallon of lactose free milk because it was a good organic brand on “managers special” at her grocery store for cheap. But Ive been using my raw milk for everything (including yogurt that was grrrrreat) and figure I could make a lot of yogurt with this lactose free instead of the raw (so i can use it before it expires). Ive read some things online that say “yeah you can…ive made it and it worked great” and other things that say heck no because the cultures need the lactose (which i do understand how that works). Anyone made this with lactose free before? any suggestions?
I make yogurt in my crock pot and it couldn’t be easier! I usually use organic vanilla soymilk and then strain it so it’s more greek-like. 64 oz of milk yields about 38 oz of yogurt. Delicious!
I made this Thursday night and I have one thing to say: AMAZING! I never knew it could be so easy! I did use raw milk, and it turned out great. Its maybe a smidgen thinner than the finished product picture, but its still yummy to my tummy. I agree with Chennywren: I mixed in some of my fresh homemade strawberry jam and OMG it was like heaven in my mouth. I also love her idea of freezing the starter for future use. 🙂 This is totally my new favorite thing to do!
Bought and used a yogurt maker for several years before I found so many lovely ideas on the topic on line. Oh well. It has more than paid for itself. Since, I have also made it in the crockpot but the consistency was thinner but then maybe I used the 2% milk I had on hand. Can’t remember. So enjoying all the different methods and will have to give them a go!!
My latest favorite way to eat our homemade yogurt now that strawberries are coming into season is to put a dallop of homemade lemon curd and a 1/2 cup of sliced strawberries on top! I packaed it up with 1/2 cup of yogurt in an 8 oz canning jar for a mid-morning or mid-afternoon jar of spring to enjoy at work!
I’ve been making my own yogurt for a couple years now, and the thing that used to bug me the most was all the dishes, until I discovered THE BEST way to make it – pour the milk into the glass jars ahead of time, put the jars in a big canning pot and add water up to the level of the milk and heat it up that way. Less stirring, no washing the pot afterwards 🙂 Then I use jar tongs to take them out, put them in the sink and run cold water into the sink until it’s up to the level of the milk. It cools super fast that way. at 100 degrees I stir in the starter (just a leeeetle bit, one of the biggest mistakes I made in the beginning was adding too much yogurt), put the lids on and stick them in the oven overnight with the light on. Perfection!
I’ve also found that the best way to keep it thick and creamy is to NOT STIR it after it’s done. Makes it get stringy and loose. Just scoop out what you need, and when whey pools on the top of the yogurt pour it off into the sink instead of stirring it back in.
I freeze yogurt in ice cube trays to use as starters. I make a gallon of yogurt at a time with only one cube. My process is this:
Pour milk into stock pot.
Slowly heat to 180 degrees.
Cool to 110 degrees.
stir in one cube of starter until melted completely.
set, covered in oven with light on and a kettle of hot water.
Let sit 10 to 12 hours.
If you like greek style, strain yogurt using cheesecloth or jelly bag.
Ladle into four (two for greek) quart jars and refrigerate.
I’ve never had a failed batch with this method. Awesome with honey or a spoonful of homemade jam. When I use up the last of a jar of jam, I add yogurt to it and eat it from the jar. Just like eating oatmeal inside of a nearly empty peanut butter jar :]
I have been wanting to try this so thanks for the information and for telling it in an awesome way. And also, thank you for telling people the fat in milk is healthy because skim milk is annoying to me.
I have been making yogurt for ages too. I use raw (unpasturised) organic milk. some tips I have discovered, 1. you will get a thicker yogurt if you keep it at the high temp for 20mins or so rather than just getting it there and then cooling it down. I use a 1litre preserving jar and just put it in my hot water cylinder cupboard overnight or for about 8 hours, with the lid on. I put it in the freezer for an hour when I first take it out in the morning this seems to help it set and go nice and smooth. I also pour off any extra whey on top. If it seems lumpy you can give it a whisk before this stage. The best tip I can offer is to take a couple of tablespoons off your fresh yogurt and store it separately in the fridge to be the starter for the next batch. I haven’t had to buy starter for months!
As a long-time yogurt maker and love, a couple things to add.
You are heating the milk to 185’ish to do two things. One is to kill whatever bacteria is in the milk. Making yogurt is basically culturing specific bacteria — namely the good stuff you add later. So you’re pasteurizing the milk.
Secondly, the longer you hold the milk at 185 or so the smoother and thicker the yogurt will be. Getting it up to temp then cooling immediately will often leave you with a thinner and sometimes kinda lumpy yogurt. Still good, just not quite what most expect. Let it go for 15 minutes or so to cook up those proteins. Adding some dried milk once it’s up to temp will also help thicken the final product. Adding the dry milk also brings up the protein level a bit. Next you need to understand that there are two types of yogurt cultures. They can be mesophilic (room temp) or thermophilic (heated). You may need to know the difference.Most in the US are likely dealing with thermophilic cultures, especially if it’s what they’re buying at the market. Thermophilic will thrive (form the yogurt) better in a heated milk — i.e., the 110 degree or so. That’s what you’d use with a yogurt maker *or* a heating pad method *or* a crockpot method. Most common grocery store yogurts are based on thermophilic cultures. They’re what is used for Greek or Bulgarian Yogurts for example and are ubiquitous in the US.There are other yogurt cultures out there that are mesophilic. Meaning they form best at near room temperature. Different bacteria. So here you’re looking at what are usually much thinner yogurt “drinks”. Thinner and the flavors vary depending on the culture used. So, if you’re following the directions above you’re probably dealing with a thermophilic culture. That means keeping the temp up around 110 is probably a good idea to encourage the good bacteria to thrive before any contaminants might take over. That way it will be ready in about 7-8 hours. If it’s taking longer you’ll increase the risk of contamination. I personally find that putting the pot on a heating pad set to medium and covering it with a heavy towel (to keep things toasty) keep the milk at an almost perfect 110.
So take your time and treat yourself by letting it hold at 185-190 for 15-20 minutes. Then cool it down to 110 before adding the tb of fresh plain yogurt (so you don’t kill the bacteria that you’re trying to culture). Then keep it toasty warm for about 7 hours. Pretty much fool proof at this point.
Excellent information, thanks Keith!
I have been told it has proteins, some of the vitamins and minerals (in particular potassium), and a bit of the sugars as well as some of the good bacteria. People often use the whey when they bake as it adds more flavors and “personality” to baked goods. Some people will make a “whey lemonade” by mixing in some lemon juice and a sweetener. So think of it like a lemonade with protein, potassium, and stuff that makes the digestive tract happy…
I discovered a while back that most organic milk has already been processed at high heat, so there is no need to do the time consuming heat-and-cool. I put mine in my Vita-Mix for a few minutes to mix in the powdered milk and warm it up, then put it in my yogurt maker overnight. So much easier!
I love making yogurt– I do it basically like this, but I heat the milk directly in the jars (in a pot of water), then cool slowly to 110 and add the starter. I put them back in a pot of hot water, wrap in a fleece blanket, and leave in the oven overnight. I use local whole milk and it usually comes out pretty awesome.
I love homemade yogurt. In fact, I love making anything homemade. My husband blessed me with a yogurt maker a couple of years ago. We’ve made everything from full-fat, organic yogurt to non-dairy, coconut milk yogurt. Good stuff and good for you.
SAY CHEESE!!!
You can make all this yogurt in a bigger pan, once milk turns into yogurt –
put it in the oven for like an hour, at about 400-450 F and guess what –
you just made an awesome cottage cheese – it just has to be put into a cheese cloth
so the extra water can be removed. Yum!!!
Ooooh now we’re talkin’ 🙂
Homemade yogurt is the best, and like you said, soooo easy! I make mine almost the same as you but I don’t portion it out (and I like to strain it to make it thicker). I never used to even like plain yogurt until I tasted homemade. Now I love it!
I’ve been making my own (Matsoni) yogurt for years. I got my first starter from a friend’s mom in Japan, and unfortunately it died, but I’ve successfully made it using freeze-dried starter too. One time I ran out of milk and made it with half-and-half…MAN, was that delicious! Mostly I eat it plain–I put it on my cereal instead of milk–but sometimes I mix in honey or a little jam.
I use a totally different method – cool to 120 degrees and keep in a cooler full of hot water overnight. But the wide variety of methods just proves what the author said: making yogurt is REALLY FREAKING EASY and everyone should try it.
Also, for the record we use raw milk and don’t have a problem. It’s not as firm as commercial yogurt but we don’t care.
Holy shit that sounds super easy, gonna have to try it! Thank you for this!
Make your yogurt with half-n-half and then add honey to the finished product. Puree strawberries and mix in – it’s just like a dessert!
Well, this seems unnecessarily complicated to me. All I do is mix a tablespoon of bought plain yogurt with a litre of UHT semi-skimmed milk at room temperature, put it in a yogurt-maker (just a pot within a covered outer pot that you plug in and it keeps it warm – a warmed flask wrapped in towels would do as well), leave it overnight, stir well, then drink it warm for breakfast. Sublime! The rest goes in a big covered jug in the fridge to use over the week. Just have to remember to sterilize everything with boiling water first (else it won’t set properly), and not to disturb the yogurt while it’s setting. It becomes thicker and tarter with keeping.
For all you greek yogurt lovers out there, you can do the same with plain greek yogurt. The only difference is, instead of pouring it into individual jars, culture the yogurt in a quart jar until it is set and then strain it through cheesecloth until the yogurt is nice and thick. I have tried this with plain yogurt too, although I find it is still tart. Supposedly they are the same cultures, I don’t know, but starting with a plain greek yogurt makes it just slightly tart and very creamy. Don’t forget to save some from this batch for your next!
Hi! This post was frankly intriguing for me, because here in my home, we make yogurt everyday! We don’t set it in glass jars though. It never lasts long enough as we consume it everyday 😀 And well a couple of pointers:
1. If you live in a tropical country, don’t add too much yogurt. And it will probably set faster too! I remember my mom telling me that in the 1980’s, when she was in North India (where winters get very cold), she would wrap the containers in which yogurt was set with sweaters to keep them warm 🙂
2. Once you start making yogurt, you can use the yogurt you made as the starter culture for the next batch. So no need to get a new cup of store-bought yogurt every time. Awesome post as usual 🙂
I cant wait to try this! heading to the kitchen now!
What’s te expiration date of te new yogurt? The same as the milk used to make it? Or do the probiotics extend the shelf life? We don’t go through tons of yogurt so I’m wondering how long we can keep it, since it is already sour it would be hard to tell from the sniff test. Does it keep just until it molds or something?
Maybe start with half of a batch?
It’s definitely not an indefinite shelf life, but we’ve had ours in the fridge for up to a couple weeks without any problems. I’ve had a time when I’ve gone on vacation and a stray jar of yogurt was left and when we came back it had pink bloom on it – definitely threw that batch out! But it lasts longer than a couple of days. And don’t forget – you can use it for marinades, baked potato toppings, smoothies, pancakes . . . endless list!
Or freeze half of it. I like to pour mine in muffin tins and freeze them. They thaw overnight in the fridge and are perfect to use in smoothies so you don’t have to add ice.
This is cool. I LOVE making yogurt!!! I’m going to share this on my FAcebook page. Love and hugs from the ocean shores of California, Heather 🙂
It amazes me how there are so many people who make yogurt in so many different ways. Having initially learned how to make yogurt from http://www.makeyourownyogurt.com/, I always cooled to 110, put my jars in a pan with a heating pad and incubated for 7-8 hours at 110-116. I’m going to try the oven method now!!
One note, Jennifer didn’t mention, but I have found that if you DO disturb your yogurt during incubation, the yogurt comes out with a much grainier, somewhat unpleasant texture. So take my advice and leave it alone!!! 😛 Great post!
I wonder though… I ♥ vanilla flavored yogurt.. so can I do that?
Beth – you can flavor away to your heart’s content – AFTER you make the yogurt. For vanilla, put a bit – try 1/4 t. first and adjust to taste – of real vanilla extract and a swirl of honey, and you’ll have vanilla yogurt to die for. But don’t count out plain – try it with some yummy granola and you might be hooked!
I think I will try this!! It sounds easy and not intimidating… I think I can do it☺
Can you strain this yogurt through a cheesecloth in your fridge and make it thicker, more like greek yogurt?
Yeppers. Strain away, and it’s excellent greek yogurt. Go girl.
If you strain it even longer, you get a great cream cheese alternative. Perfect for dips.
Thank you for this – it looks like the easiest recipe I’ve seen for homemade yogurt. I am horrified by the amount of sugar in my kids’ store-bought yogurts, so I can’t wait to try this and add my own fruit, honey, etc.
Since I do want to add in additional flavors, can I put all the yogurt in one big container in the oven, or do the little containers make it go faster?
I haven’t done one big container – the smaller jars are just handier for portable lunches – but from what I’ve read it’s similar time-wise. Let us know what you find out!
I learned how to make yogurt from a friend whose dad majored in dairy science in college and she taught me to make it all in one big batch, so it should be fine. Mine has always been on the thin side but I think that is because I get impatient and put the starter in while the milk is still hot.
Can you then use the 1 tablespoon from the home made yoghurt to make the next batch?
I’m going to make some tonite! So tired of buying containers and containers (always plastic!) of yoghurt for my daughter… And then I’ll try to make it with non-cow milk for myself – THANKS!!!
Yes, you can set aside some plain yogurt for the next batch. I say set aside, because if I don’t, the kids eat it all! I have not bought commercial starter or store bought yogurt in years.
Oh I finally just got around to it tonite – but since I’m in CO, the milk skinned at 160 – I hope it didnt get cooked too much 🙁
This is great! I’ve made my own yogurt before (vietnamese style) but followed a slightly different method. I mixed my milk and culture first and then used the crock pot to heat the milk. Very fun, I’ll try your way, I like the idea of leaving them to hang out in the oven.
I make yogurt and it’s really fun. Mine has lots of whey though. I always have to strain it. Guesses as to what I might be doing wrong?
It’s natural for there to be liquid on the top. Just stir it well in. If the result is too thin just leave for a day or so to thicken up.
You can use the whey for other stuff though!!!! Like fermenting veggies and condiments
I’m lactoseintolerate but this still looks intriguing!
That’s the great thing about yogurt! Those Live & Active Cultures eat up almost all of the lactose, which is why yogurt tastes tart. It has very little milk sugar (lactose) left in it!!
According to the Google, virtually all the lactose is gone after culturing for 24 hours. I have often let mine go that long and while the yogurt is a bit more tart than a shorting culturing time it’s still delicious! This is another great perk of making it yourself – since commercial yogurt is usually only cultured for about 4 hours you have total control over the amount of lactose in your final product when you DIY.
I’m also lactose intolerant – but I’m able to eat yogurt everyday. I LOVE greek yogurt with fruit and granola. I use it to make pancakes too – nomnomnomnom….
I’m in love with this and am going to try it soon! I’m tired of spending so much for all the yogurt my family eats! 🙂
The longer the yoghurt is cultured, the less lactose remains. For people on the Special Carbohydrate Diet, homemade yoghurt should be cultured for 24 hours, so that all of the milk sugar is eaten up. It is deliciously tart when made this way…
Excellent tutorial! I just use my slow cooker, avoids the possibility that “somebody” might turn ON the oven – you know – with a TOWEL in there? But if you have complete control over your kitchen appliances, shouldn’t be a problem…
I tried to make yogurt in college and stuck a sign on the oven that said “do not disturb, the yogurt is sleeping”. My roommates thought I was totally off my rocker, but they didn’t turn the oven on! =P
Thanks! Can’t wait to try it! Would I have the same results making it in a larger container such as a quart jar? I am the only one here that eats yogurt and fridge space is somewhat limited.
I love making yogurt. I use the Alton Brown method. He uses a heating pad on low to keep the yogurt warm. It works out great!
I’m very keen to try this. I eat a LOT of yoghurt; I love it and it makes me feel good. I tried making it a few years ago with one of those kits, but I found that it didn’t really feel like that much of an improvement, buying a sachet of powder every week instead of a tub of yoghurt. I had heard that you could make it using yoghurt as a starter but never got around to trying before I moved house again and forgot all about it.
Eve asked if there is a limit to how many generations you can make before you dilute the probiotic goodness. I’m not sure, but I imagine that there isn’t such a limit. From what I understand, the bacteria feed on the available sugars from the milk, so unless something disturbs that process, they’ll just keep multiplying until their food supply runs out. So, unless you’re eating your yoghurt before the bacteria have had time to breed (ie. before it’s actually set), there should always be a plentiful supply of them in the next starter. Any biologists or hard(er)core foodies/crunchies/yoghurt-eaters wanna confirm or deny this rambling?
The research I’ve done shows there’s no limit, but mine has been reasonably limited to surfing the internet and taking those nice people’s word for it. The probiotics continue to grow, so once you’ve got some homemade yogurt in the fridge that’s all you need for starter; no need to buy more. Again, the fresher the yogurt, the better the probiotics, so the homemade stuff will probably be more potent than the store-bought yogurt you get going with. But I’ve yet to hit a probiotic “exhaustion wall” or something. Good luck!
Jennifer
I once made yogurt using a bit of the last batch over and over for almost 4 months. I go through about 2 quarts a week, making 1/2 gallon per week. I did start adding more yogurt starter towards the end, because it did get thinner towards the end, so I would say (in my opinion) 3 months is the limit. Since then, I have never gone a full 3 months before completely running out and having to start over.
I’ve been making my yoghurt for about 2 years now ever since I learned they pour the hot (yes, hot!) milk into the plastic containers to set up for all commercial yoghurts. Sure fire way to get more plastic into our bodies!!! Have not had good luck using yoghurt itself as the starter, so I’ve been using a freeze-dried culture, but maybe the temp thing is where I’ve gone wrong. Do you use some of this homemade yoghurt as your starter for the next batch, and how many “generations” of batches can you make before it looses its live, active probiotic punch?
I’ve made homemade yogurt before — mostly to just be able to say I could do it. I wasn’t saving any money, so I quit doing it. However, reading your comment about how it is made will definitely make me rethink this….
I am too lazy for ovens and towels…I use my thermal coffee cups because Beth Terry said I could…it works great! It probably isn’t actually much easier, but it’s what I’m used to. I’ll have to start it a little choker like you suggested, though, because mine is sometimes a little thin. I use non-homogenized milk and I don’t have the other problems you talked about…interesting.
Cooler, not choker…autocorrect…
Is it this simple using goat’s milk for those of us who are sensitive to cow? I’d use sheep milk if I knew where to get it and I knew it would work, but I can get away with some goat milk so if I knew it would work, I’d give this a try.
Maybe you can try and let us know? 🙂
Great question – I’ve not tried this with sheep or goat’s milk but have been told it’s the same thing; I know a friend of a friend who’s done this method with goat’s milk just fine. Give it a try and let us know how it goes for you!
Jennifer
I use raw goat’s milk for our homemade yogurt. I posted the instructions over on my blog. It’s super easy! 🙂
http://www.mrszadventure.blogspot.com
I’ve made yogurt both with store-bought cow’s milk and with the raw-goat milk we buy locally. Neither has set properly, it’s more like the thin European-style yogurt, but tastes just like regular yogurt! This is probably because I have the milk up to 110 degrees when I put in the starter. Next time I’ll try it a little cooler.
Be warned, though, when you warm up the goat milk it develops a strong “goat” flavor. For those of you that have had goat cheese, you should know what I’m talking about!! My husband and I HATE that goat-y flavor, so we stick to drinking the milk cold and making our yogurt with store-bought milk.
I’m new to the world of homemade yogurt but I’ve learned a super easy way. If you use Caspian Sea Yogurt (I think the technical name is Matsoni) then you don’t have to heat or cool it. Just sterilize your utensils and mix a dollop of it with milk and wait 12-24 hours. If does tend to be a bit thin, but still delicious! My Japanese co-workers taught me how 🙂